Charge Station Installation
Charge station installation consists of two main stages. First, set a unique ID on the charge station itself; then register its 3D position and orientation in space using mapping data (PCD). This information is used when the robot automatically docks with the charge station.
Setting the charge station ID
Set the ID while the robot is physically connected (charging) to the charge station. The ID uniquely identifies each charge station and must not collide with any other ID in the system.
1. Acquire the charge station ID
Retrieve the ID currently configured on the charge station. Either the initial default value or an ID previously set through software will be displayed.
2. Check the current ID
Clicking the Get ID button retrieves the ID currently configured on the charge station. For a newly installed charge station, a default value may appear or the ID may be unset.
3. Set the ID
Enter the desired ID in the input field, then click the Set ID button.
4. Setting succeeded
When the ID is set successfully, a success message appears. We recommend clicking the Get ID button again to confirm the configured ID.
Setting the charge station location
Use the mapping data (PCD) to register the 3D position and orientation of the charge station. Because the robot performs automatic docking based on this information, accurate positioning is critical.
1. Load the dataset
Click the Open button on the toolbar to load the mapping data.
2. Popup window
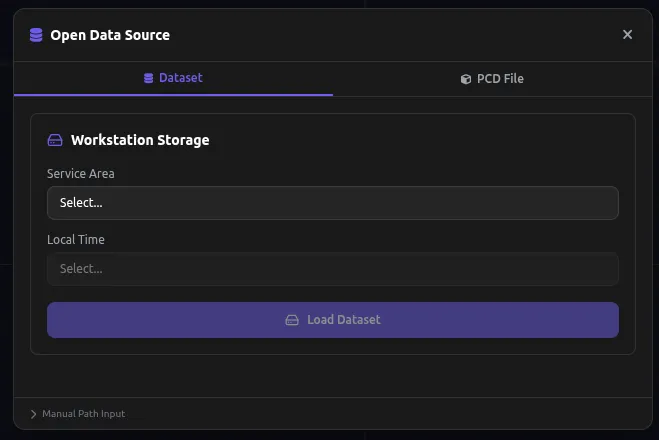
A popup window appears for selecting a dataset.
3. Select Service Area and Local Time

Select the Service Area where the charge station is installed, as well as the Local Time when mapping was performed, then click the Load Dataset button.
4. Dataset load complete
Once the dataset is loaded, the keyframe list appears in the left panel. Use the arrow keys (up/down) to step through the keyframes one by one and inspect their point clouds.
5. Load all PCD

If individual keyframes are not enough to locate the charge station, click the Load All PCD button to load the full point cloud at once.
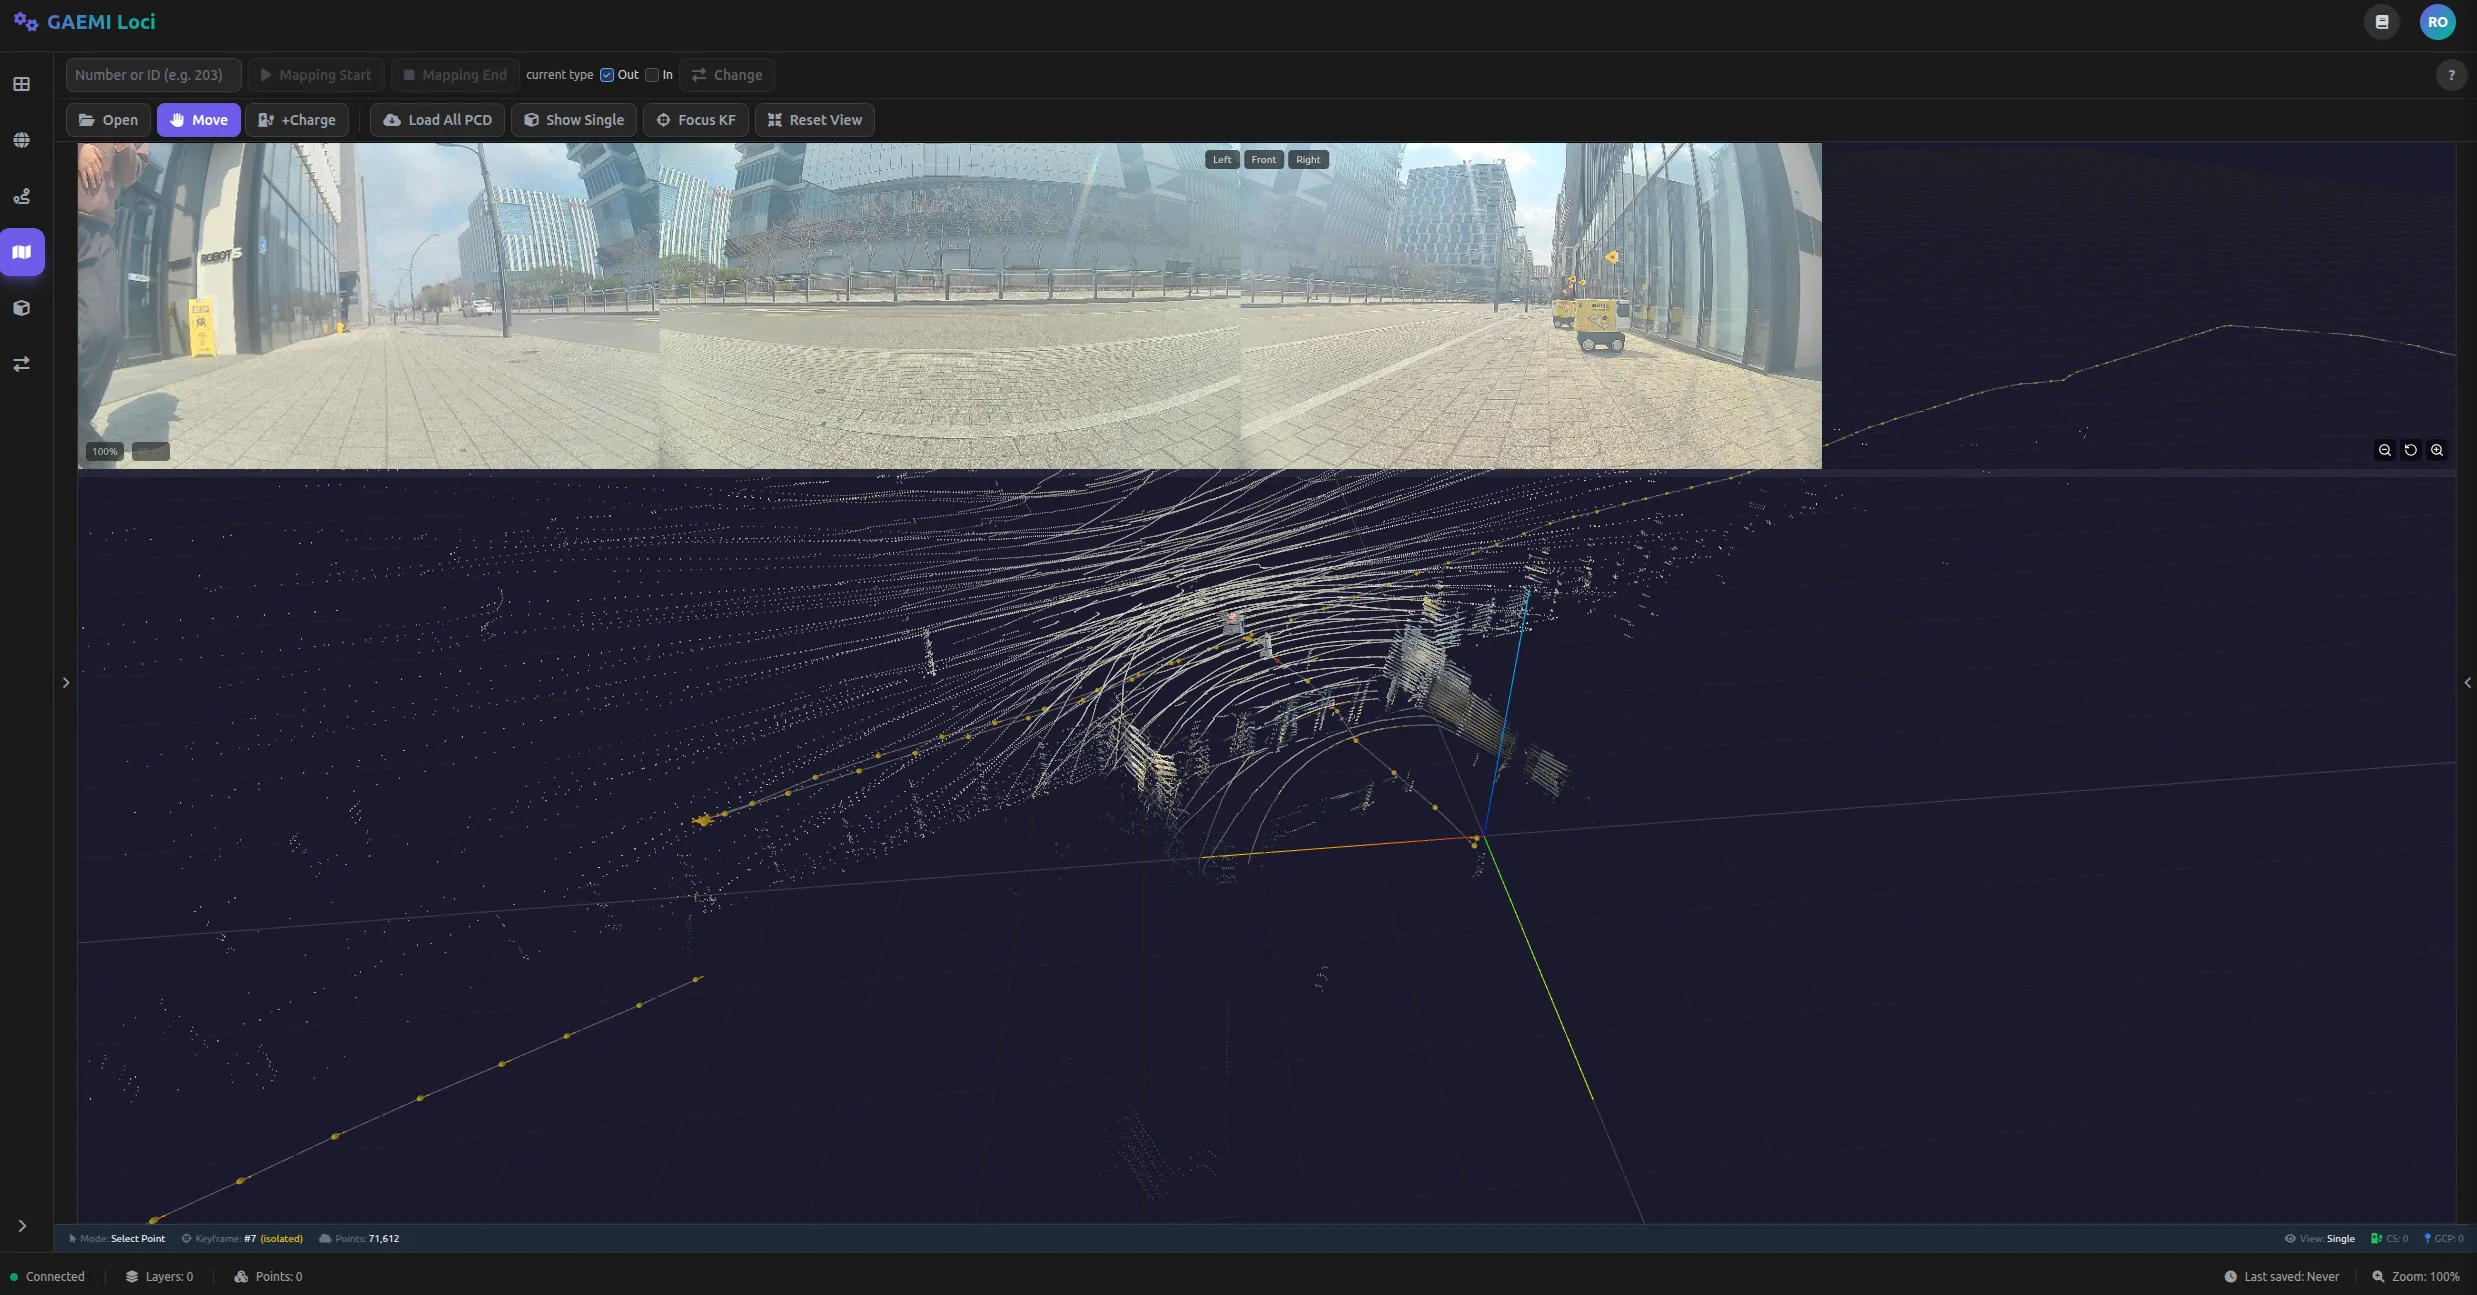
6. Loading

The full PCD is being loaded. Depending on the data size, this can take 1 to 2 minutes. Once loading completes, the entire point cloud is displayed in the 3D viewport.
7. Find the charge station
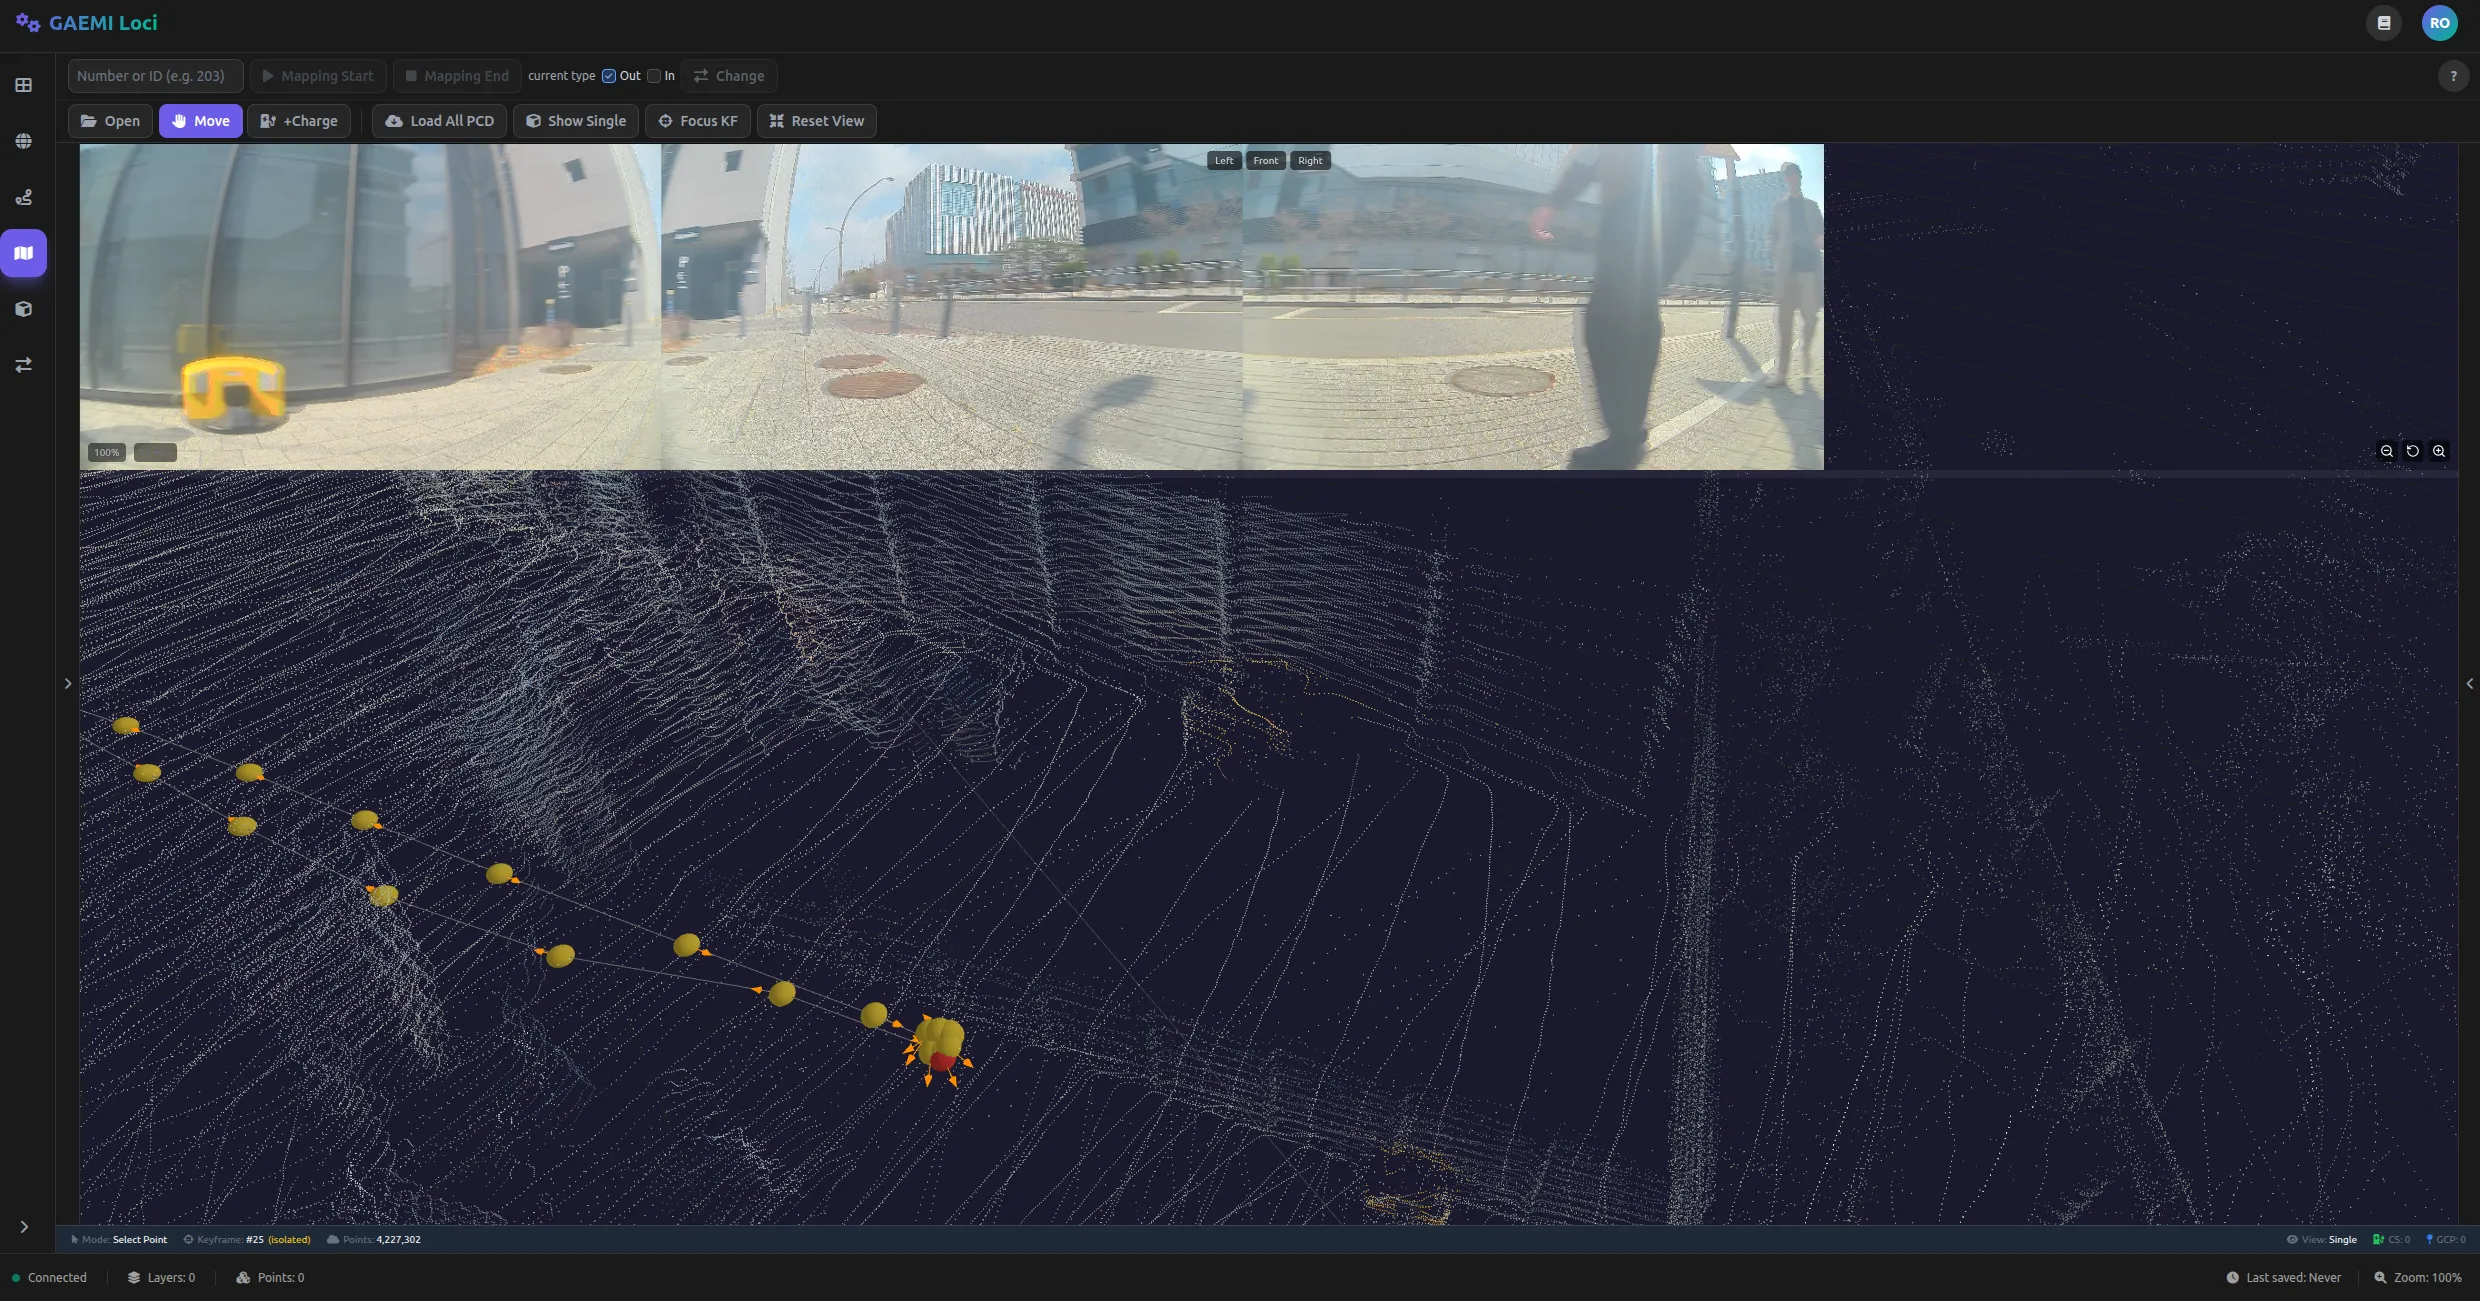
With the full PCD loaded, locate the charge station.
| Operation | Action |
|---|---|
| Left-click drag | Rotate viewpoint |
| Mouse scroll | Zoom in/out |
| Right-click drag | Pan viewpoint |
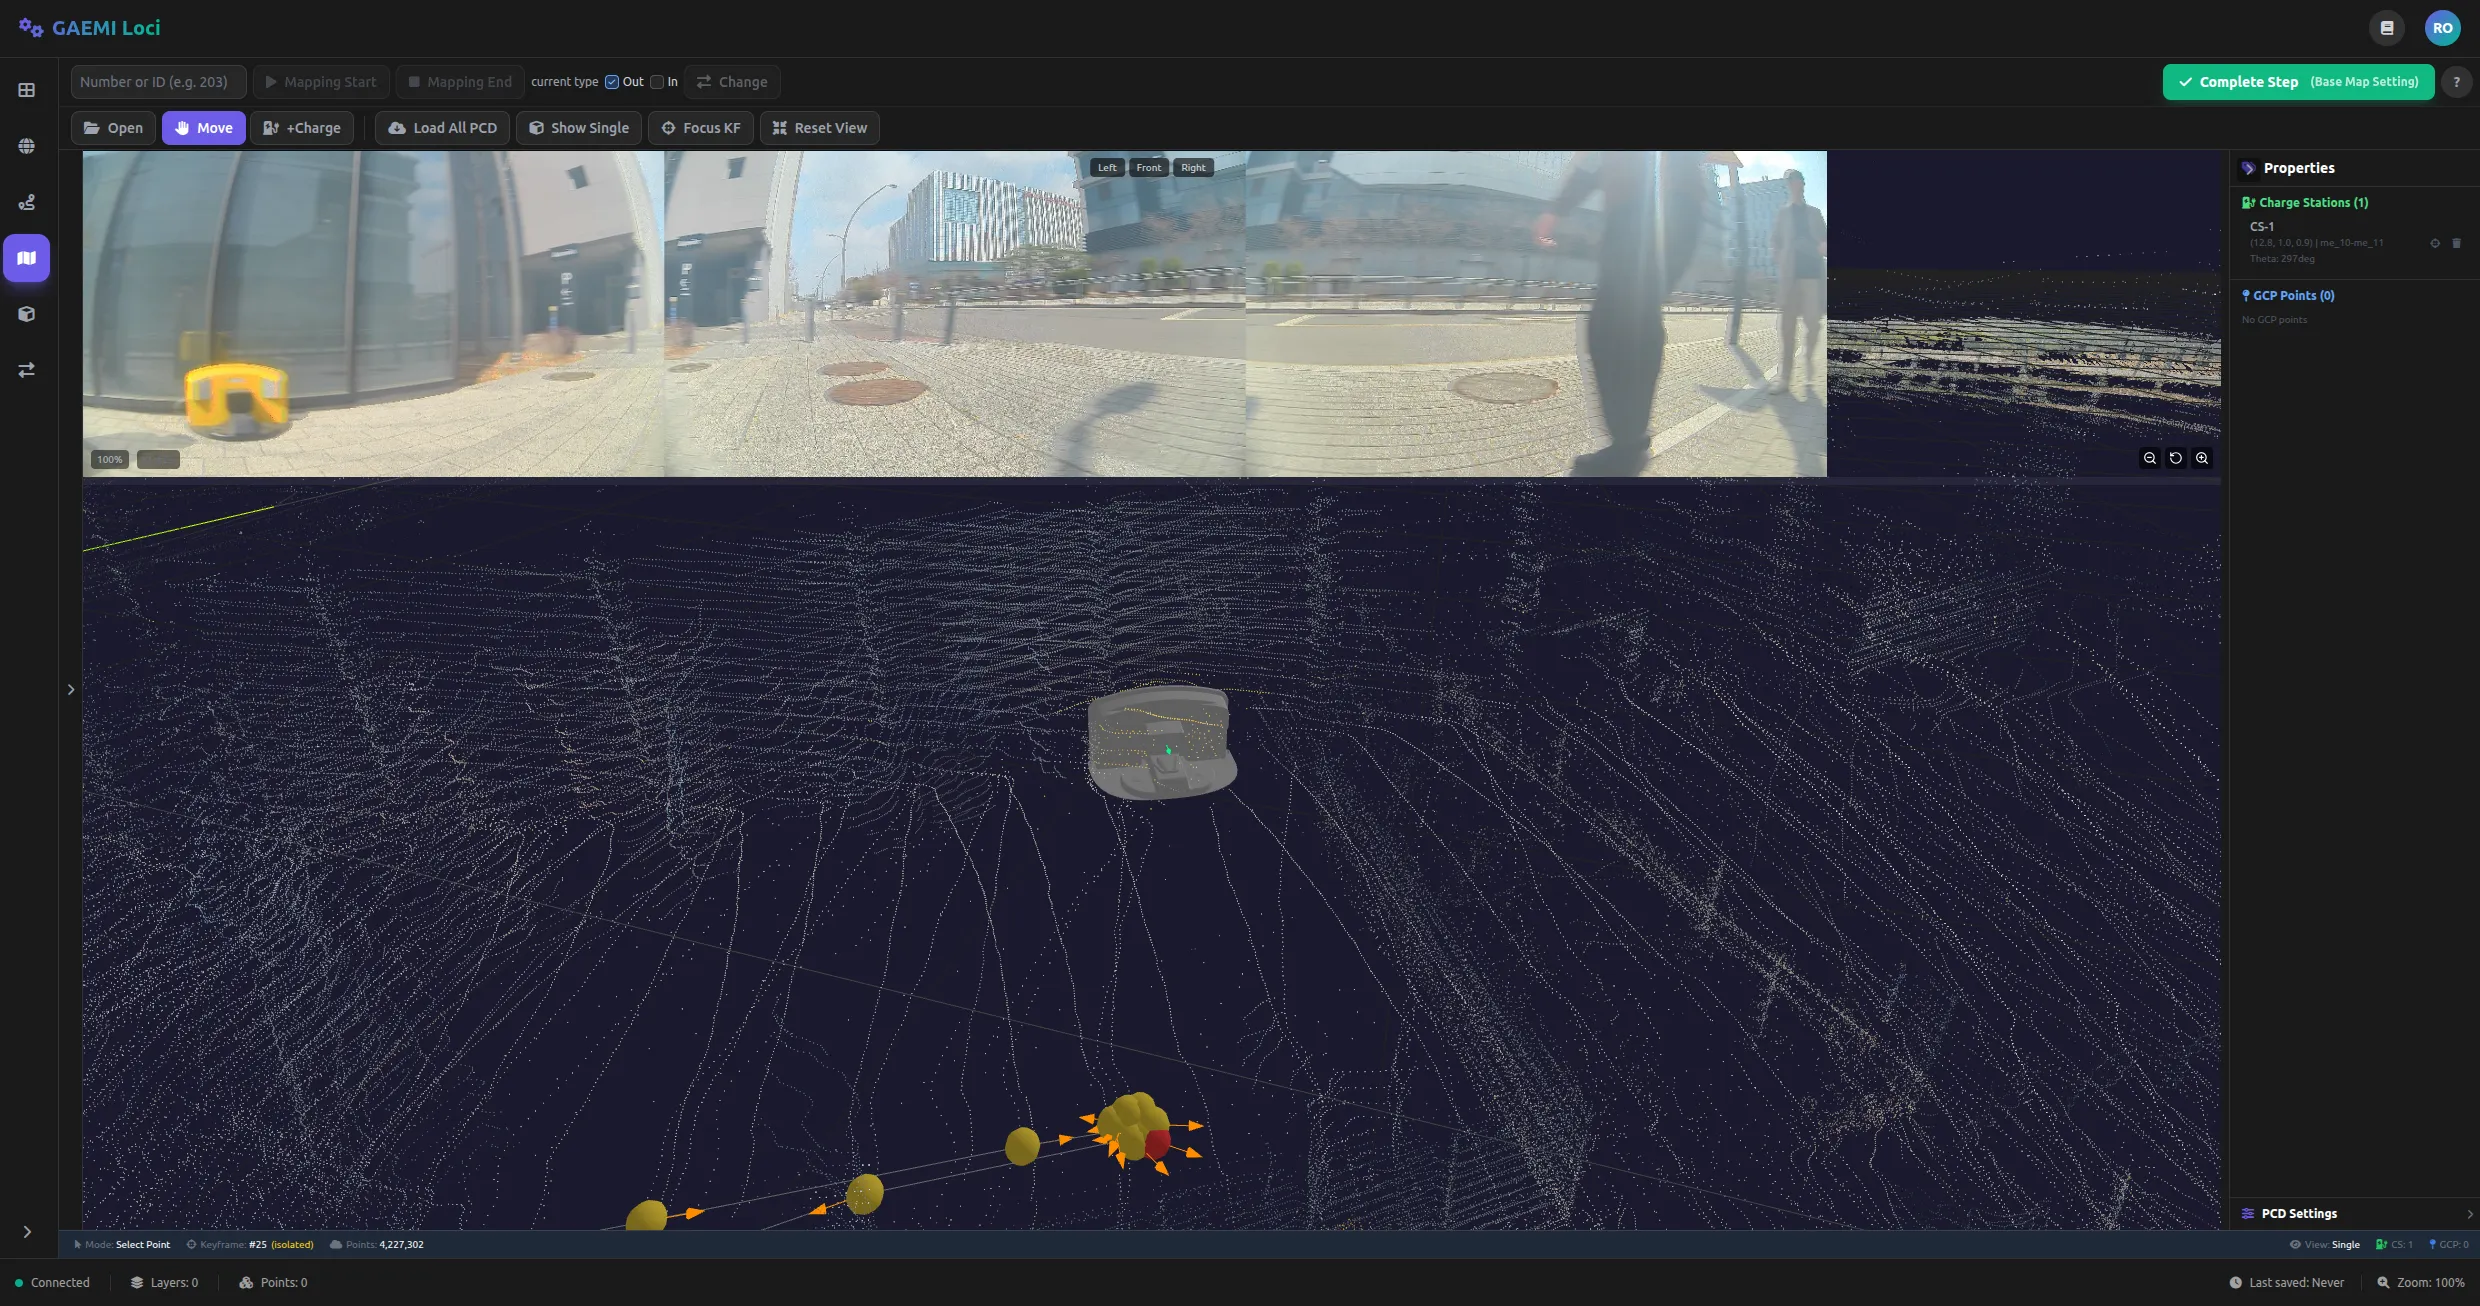
8. Click Charge+
Clicking the +Charge button on the toolbar changes the cursor to a ’+’ shape. With that cursor, click precisely on the charge station location in the 3D viewport.
9. Verify the 3D model
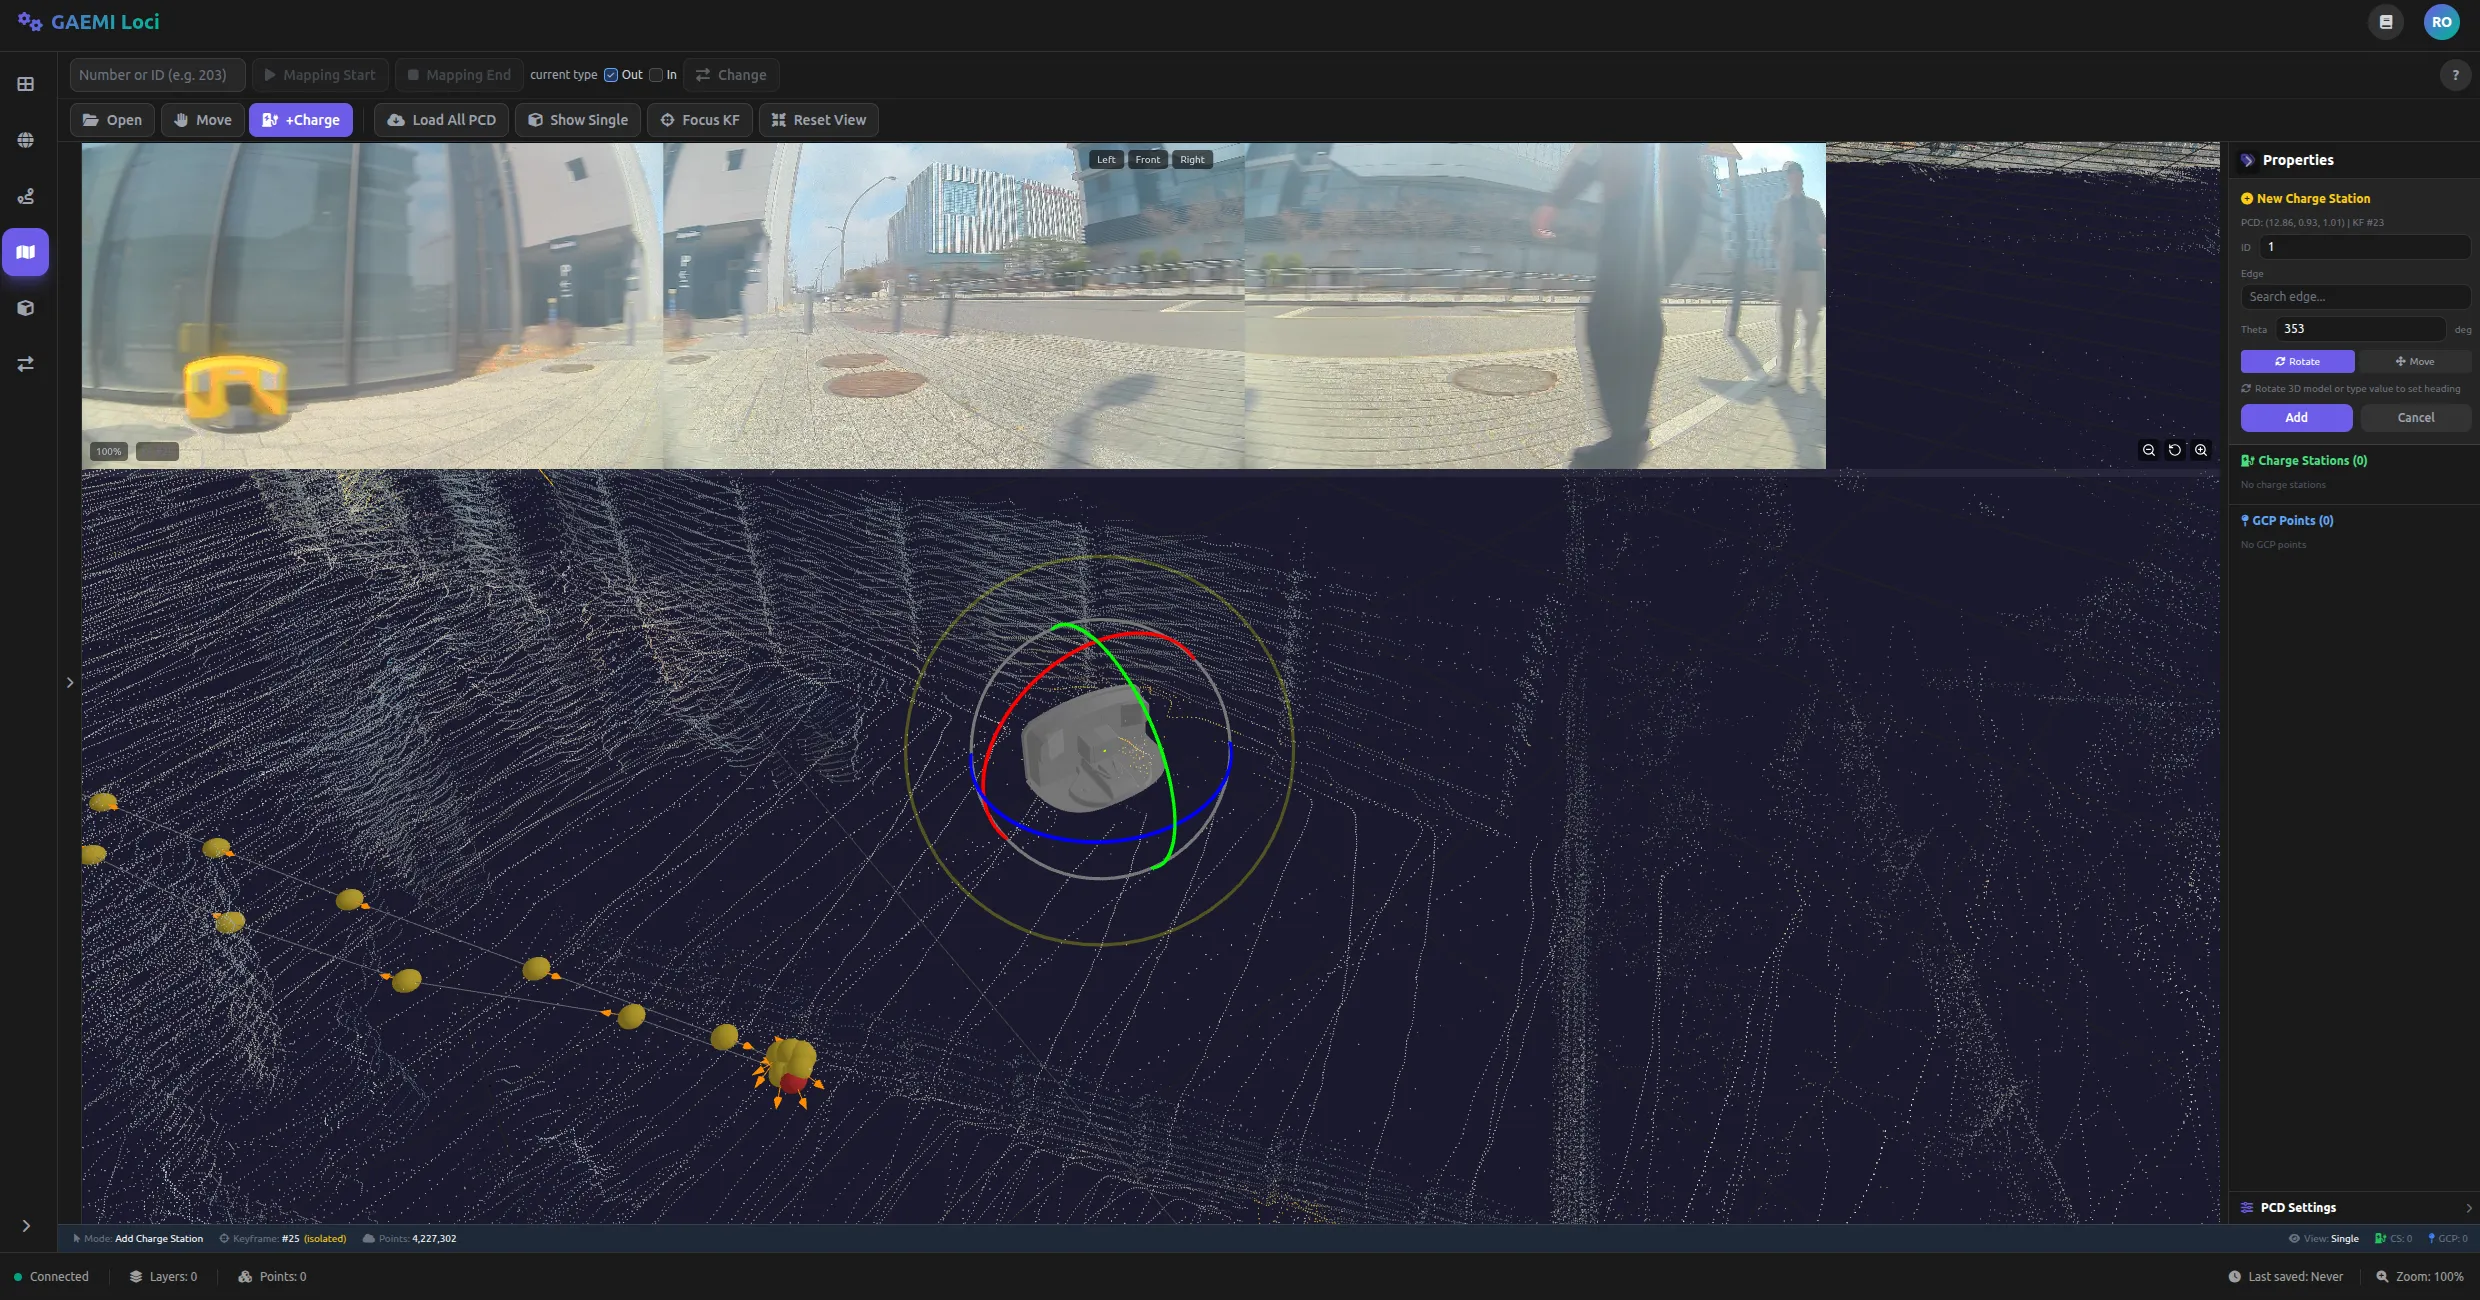
The 3D model of the charge station appears at the clicked location. Verify that the model’s position and orientation match the actual installation.
10. Fine adjustment

Precisely adjust the position and orientation of the charge station model.
| Adjustment | Description |
|---|---|
| Rotation | Adjusts the orientation (angle) of the charge station |
| Translation | Moves the position (coordinates) of the charge station |
11. Edge setting

Select the Edge (path segment) where the charge station is installed. An Edge is the path segment the robot uses when approaching the charge station. Specifying the correct Edge ensures the robot approaches docking along the proper route.
12. Confirm Add
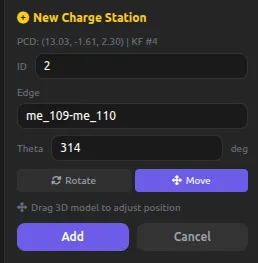
After verifying the configured position, orientation, and Edge, click the Add button to finalize the charge station registration.
13. Complete Step
Once every charge station installed on-site has been registered, click the Complete Step button to proceed to the next step.