Tile Map Stitching
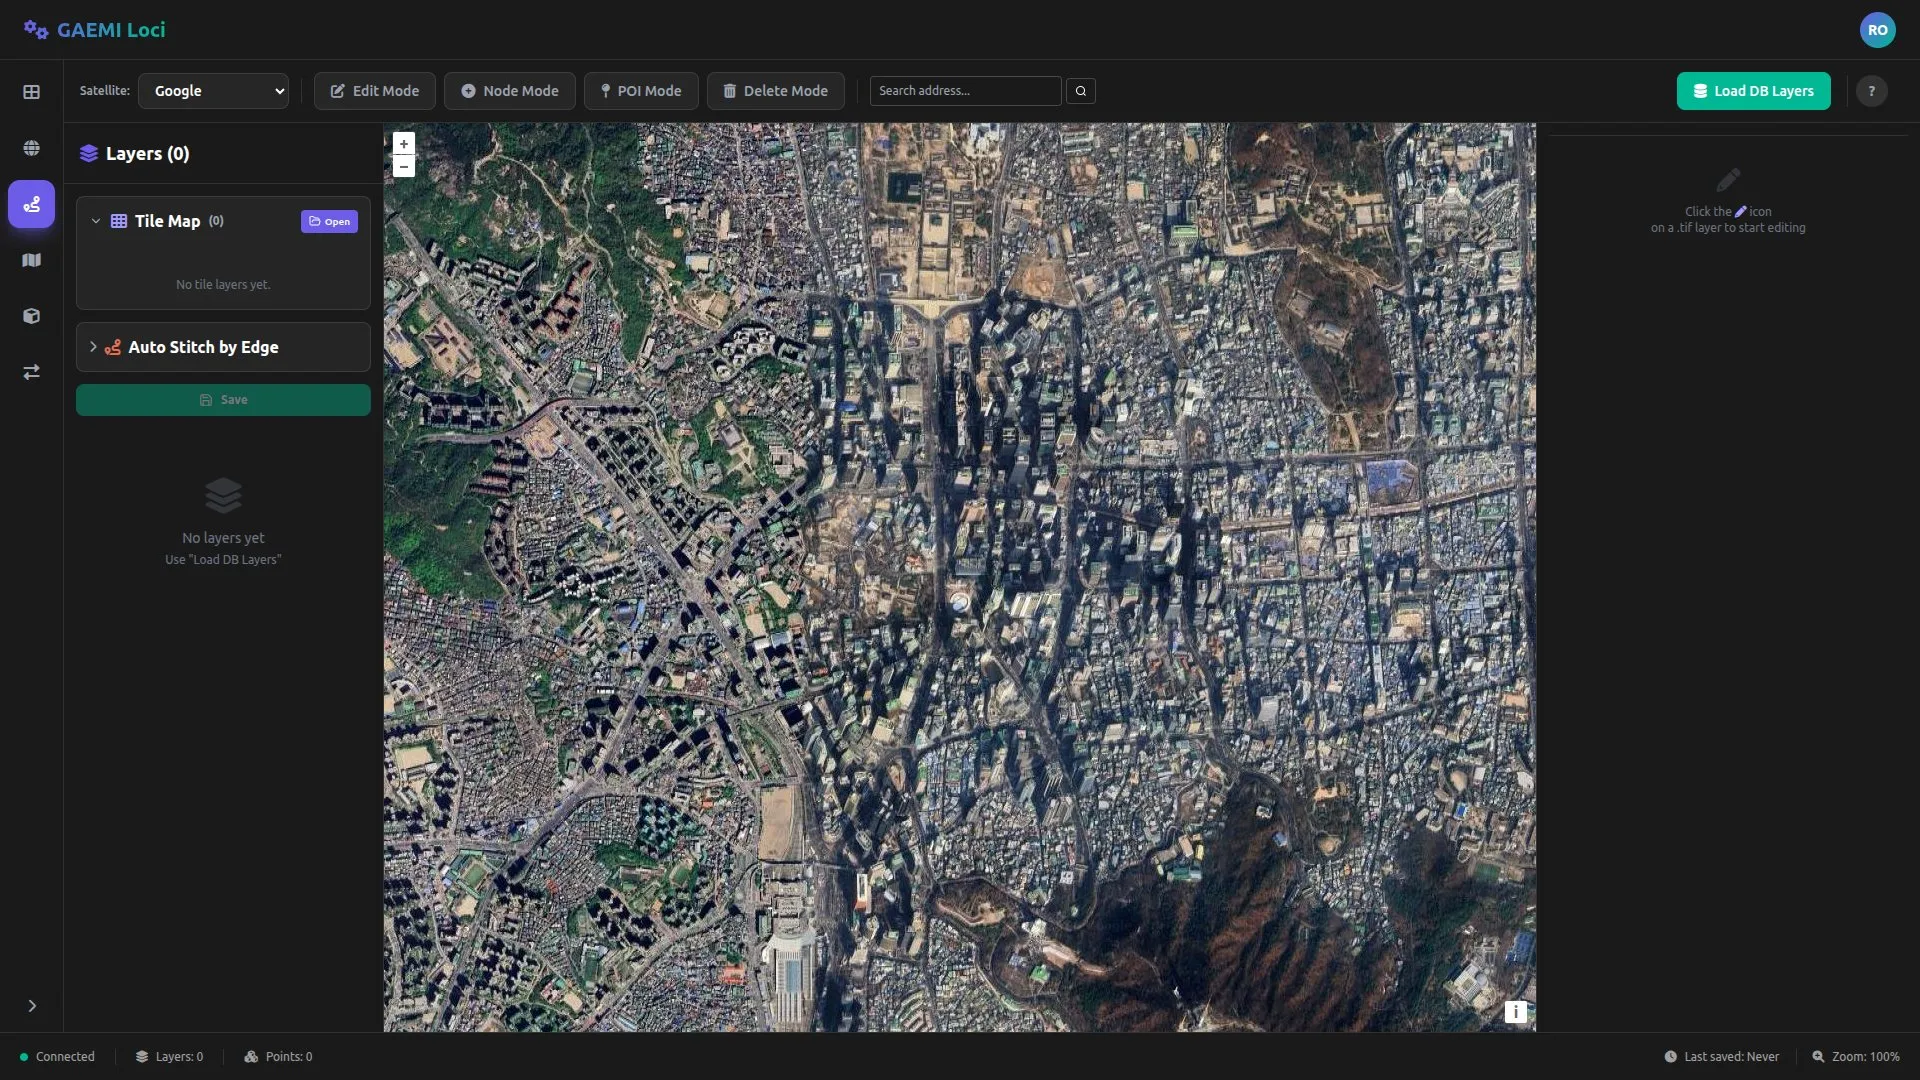
Tile map stitching merges the individual tile maps produced by the HD Map Generation Server into a single continuous raster map.
What is Tile Map Stitching?
During HD Map generation, the navigation map is produced as tiles on a per-keyframe basis. Tile map stitching is the process of placing these tiles at their correct locations and merging them into one large map.
Auto Stitch (Auto Stitch by Edge)
Based on the route_edges or route_nodes stored in the DB, the system automatically matches the tiles that cover each edge and stitches them together.
Prerequisites
Before running auto stitch, you need the following:
- Load tile map data: Use Open Dataset to load a georeferenced tile ZIP file
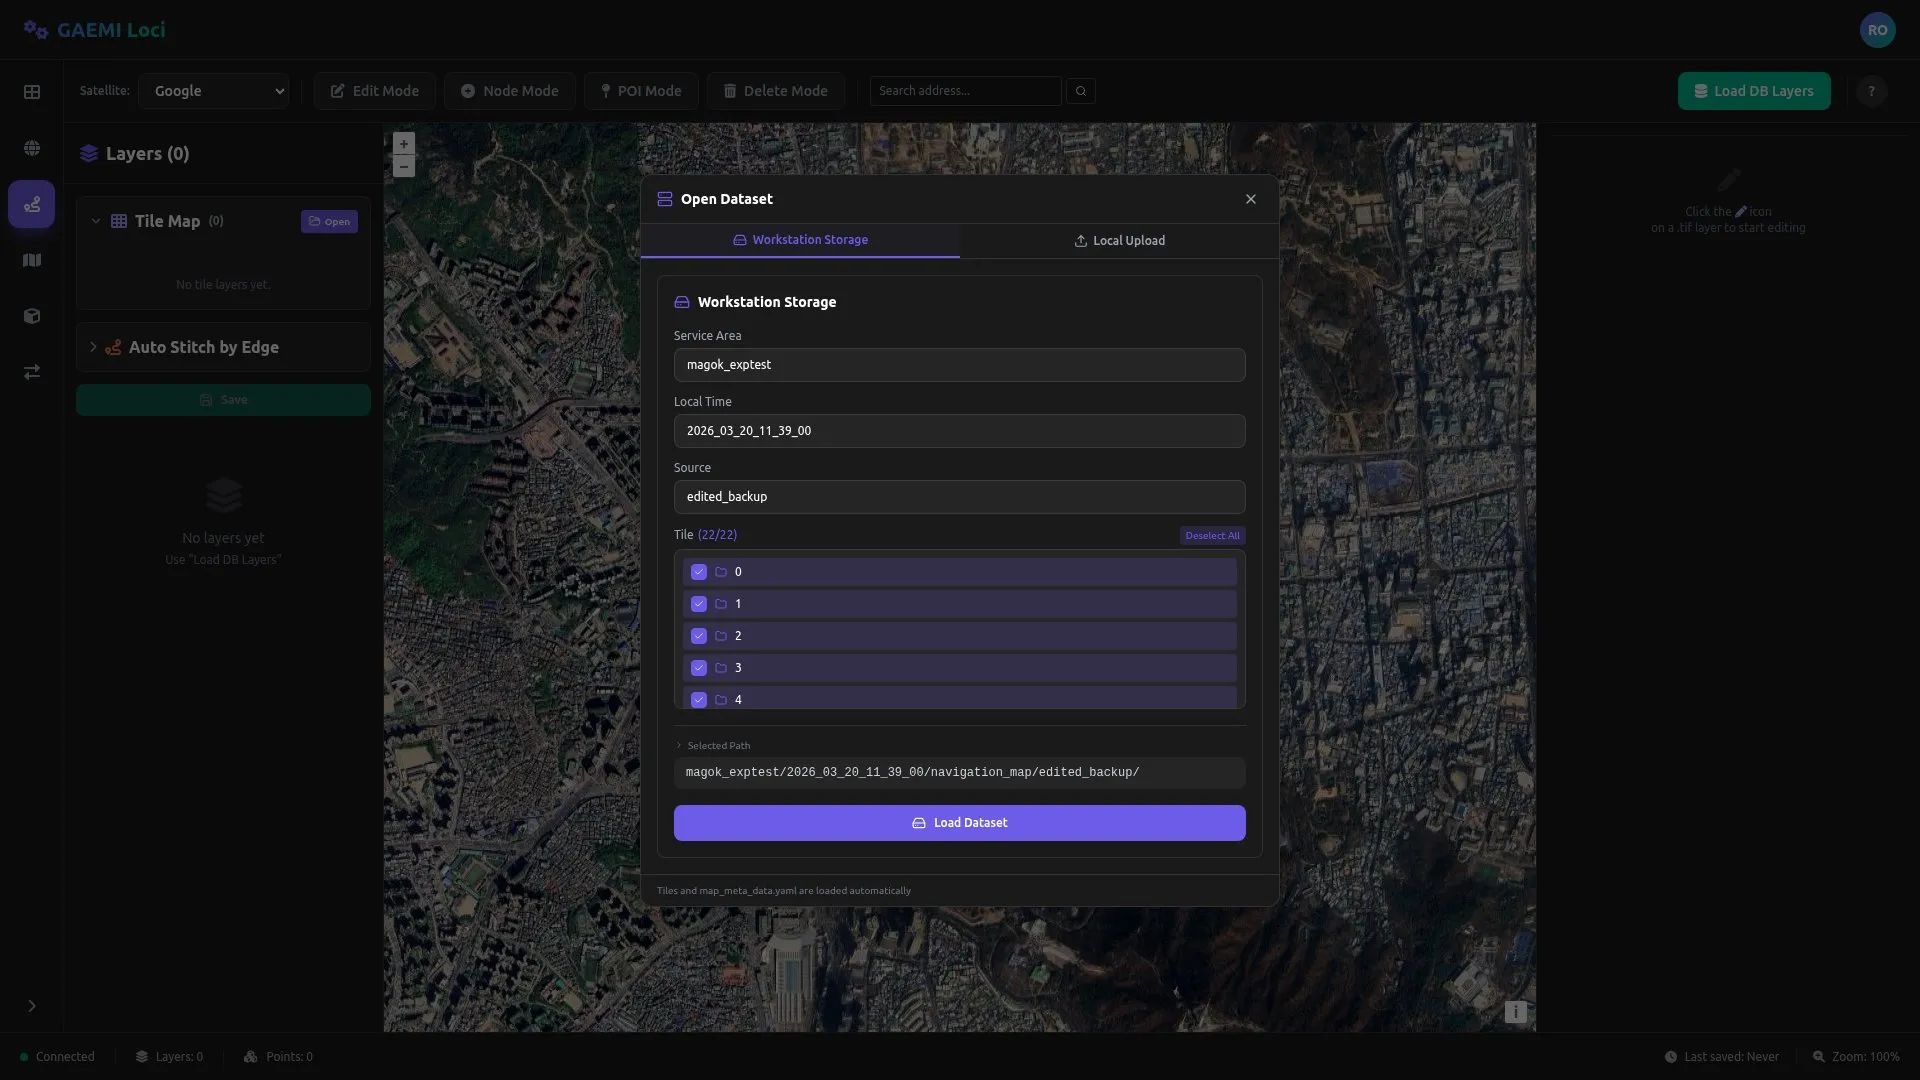
- Load DB layers: Use Load DB Layers to load route_node or route_edge data
- Metadata file:
map_meta_data.yamlor a georeferencing transform file
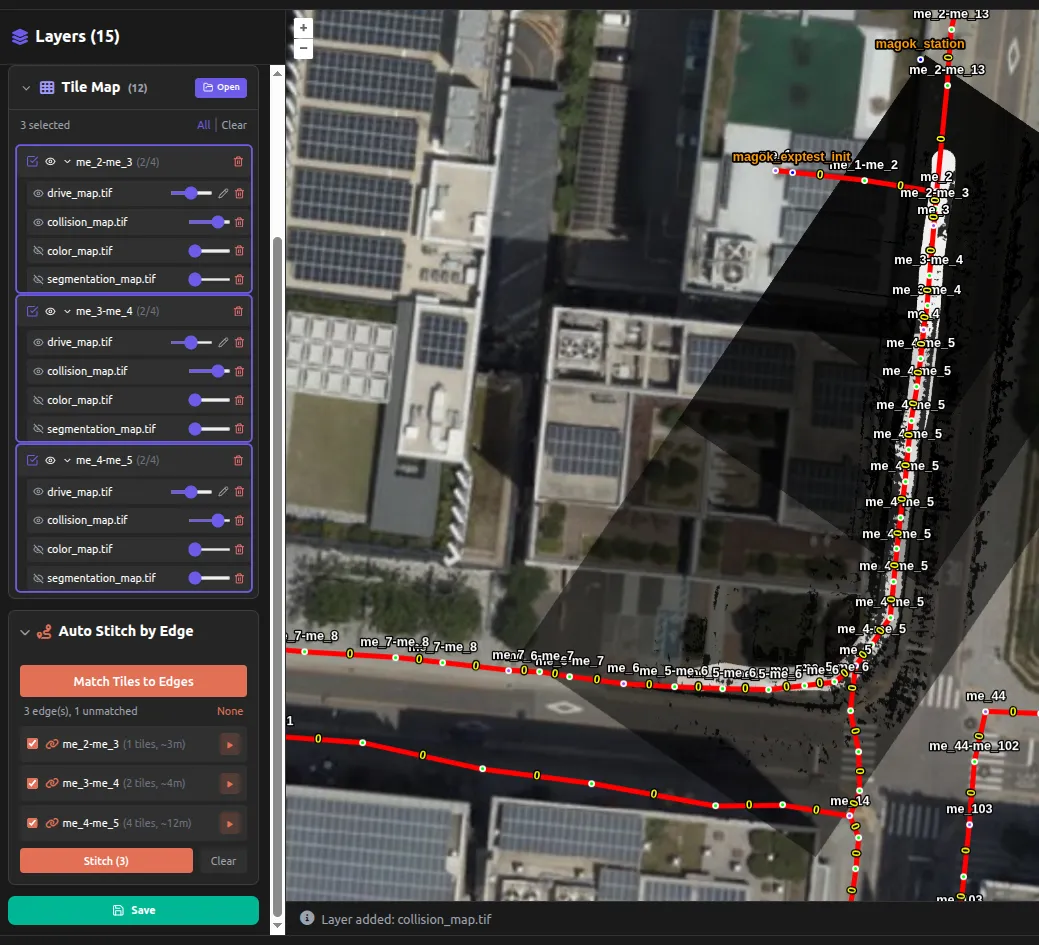
Step 1: Match Tiles to Edges
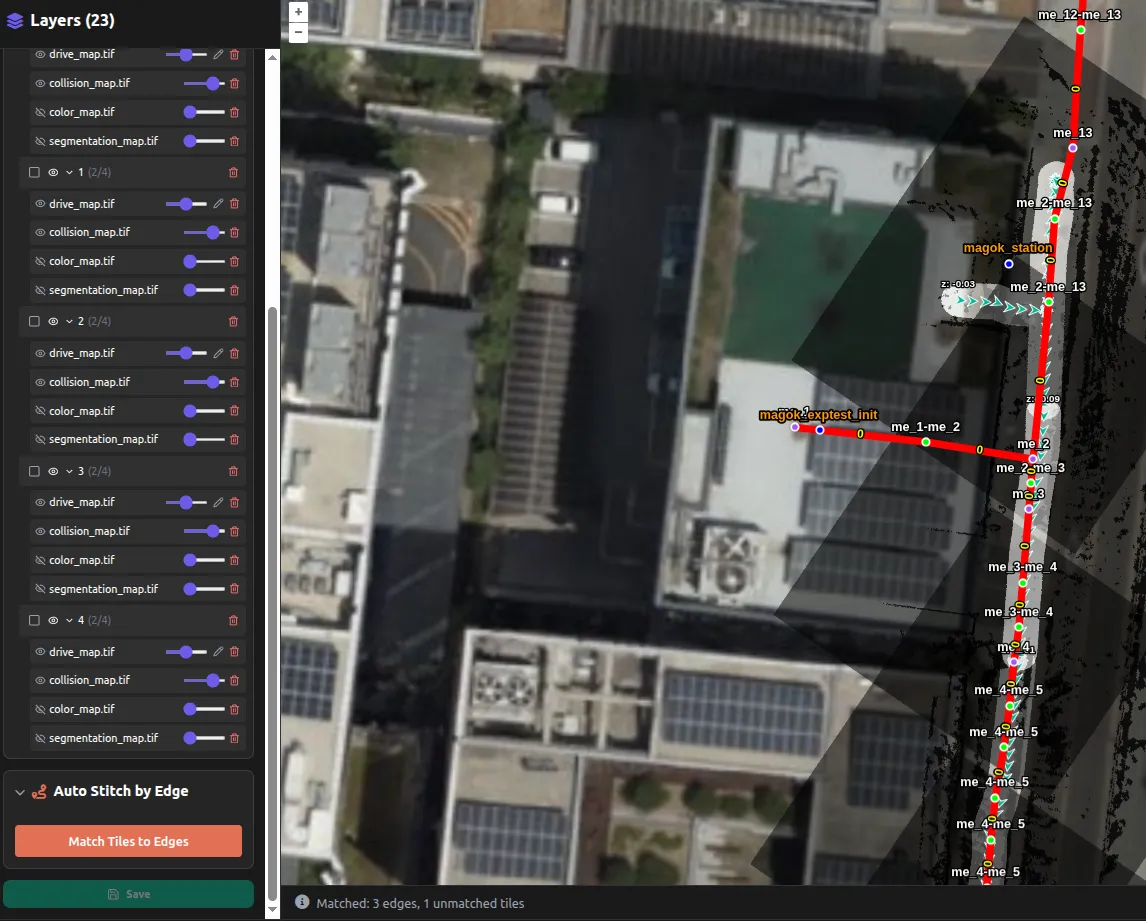
Expand the Auto Stitch by Edge section in the left panel and click the Match Tiles to Edges button.
Matching process:
- Edge extraction: First looks for tag-based edges from route_node in the DB layers; falls back to route_edge if none exist
- Tile range calculation: Computes the geographic bounds of each tile ZIP file
- Drive map coverage check: If
map_meta_data.yamlexists, the server verifies that each edge coordinate actually falls within the drive map - Full-coverage matching: Matching succeeds only when all coordinates of an edge are covered by the union of tiles
When matching is complete, the results are displayed:
| Item | Description |
|---|---|
| Matched edge count | Number of edges fully covered by tiles |
| Unmatched tile count | Number of tiles not assigned to any edge |
| Tiles per edge | Number and names of tiles matched to each edge |
Step 2: Select Edges
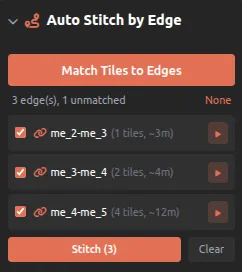
Select the edges to stitch from the matching results:
| Action | Description |
|---|---|
| Checkbox | Select/deselect individual edges |
| All | Select all edges |
| None | Clear all selections |
| ▶ button | Stitch an individual edge on its own |
Step 3: Run Stitching
Click the Stitch (N) button to stitch the N selected edges in sequence.
Stitching process per edge:
- Merge the matched tiles into a single ZIP
- Send to the server via
POST /api/tile-stitcher/auto-stitch- Tile ZIP + metadata (YAML) + edge coordinates + CRS + buffer distance (10 m)
- The server crops only the area around the edge coordinates and produces a GeoTIFF
- The resulting GeoTIFF is added to the layers in the left panel
Progress is shown in the bottom status bar as Auto-stitching 3/15: "edge_A_B"....
Step 4: Verify and Save Results
When stitching completes:
- A GeoTIFF layer named after the edge is added to the Tile Map layer list in the left panel
- The stitching result is overlaid on the satellite map in the center view so you can inspect it immediately
- Use each layer’s opacity slider to compare with the background map and check quality
- Fix any problem areas directly in the raster using the 2D Map Editor
- Click the Save button to save the final result to Firebase Storage
Using the Results
The generated GeoTIFF is displayed as a background layer under Map layers in the Navigation Editor, where it can be overlaid with the satellite map and referenced while editing paths.
Typical Workflow
1. [Open Dataset] → Load tile map data from server/local storage2. [Load DB Layers] → Load route_node/route_edge from the DB3. Open the Auto Stitch by Edge section4. [Match Tiles to Edges] → Auto-match tiles to edges5. Review matching results → Check the boxes for the edges you need6. [Stitch (N)] → Stitch the selected edges sequentially7. The resulting GeoTIFF is added to the layers on the left8. (Optional) Edit the raster in the 2D Map Editor9. [Save] → Save to Firebase Storage