Upload
Upload procedure
This is the flow for entering the Up/Downloader tab from the Dashboard to work on the 2D/3D Map Uploader Step.
1. First screen after entry
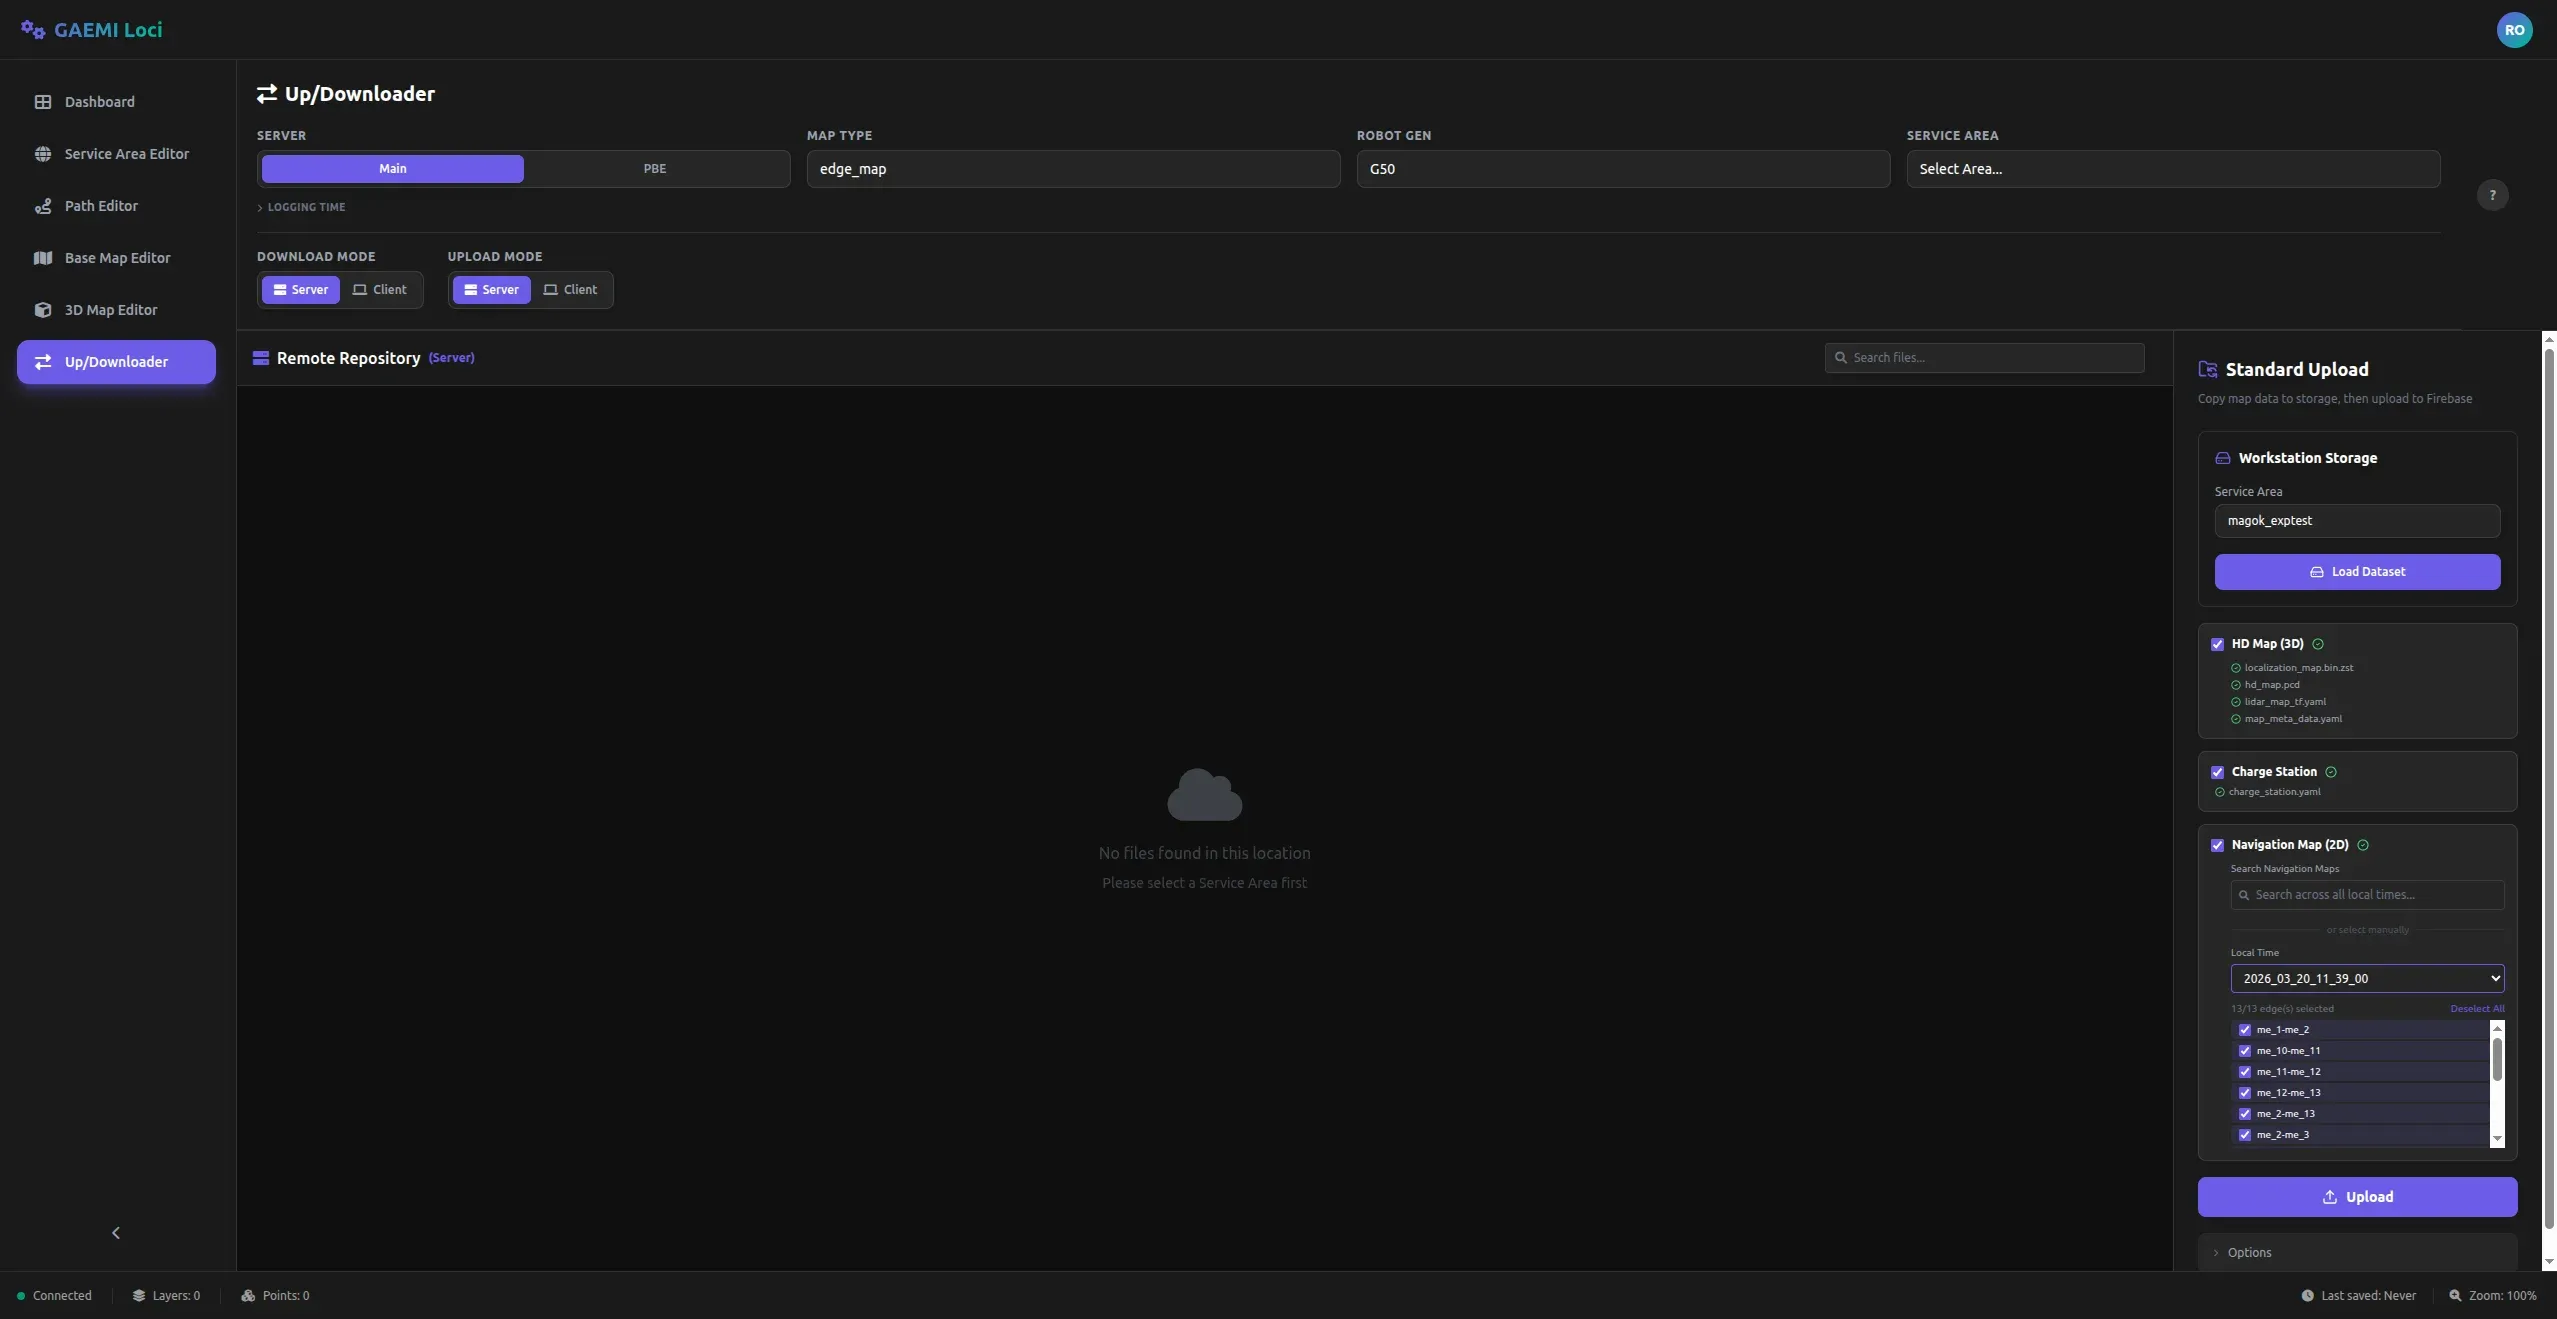
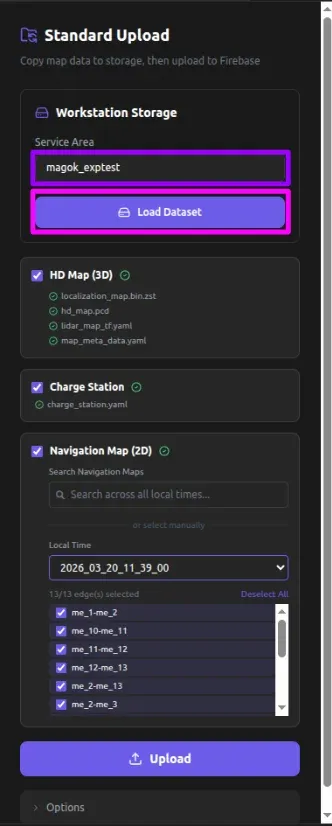
When you enter from the Dashboard, the Standard Upload panel on the right is already populated with the data to upload. The Remote Repository area is shown on the left, and the actual upload configuration is done in the right panel.
2. Verify the upload data
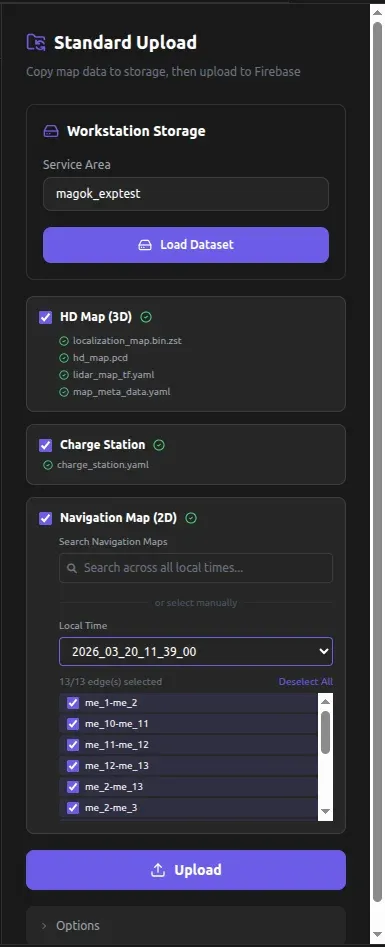
On the right panel, you can see that the following items are configured:
- Workstation Storage — shows the currently selected Service Area.
- HD Map (3D) — the list of 3D map files. A green check icon next to each file indicates that it has been recognized successfully.
localization_map.bin.zst,hd_map.pcd,lidar_map_tf.yaml,map_meta_data.yaml
- Charge Station — the charge station configuration file (
charge_station.yaml). - Navigation Map (2D) — the 2D navigation map data. A time is selected in the Local Time dropdown, and the items to upload are checked in the edge list below.
After confirming that all items are correct, click the Upload button at the bottom.
3. Confirmation popup
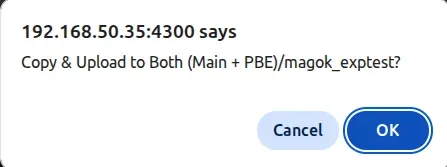
A confirmation popup appears showing the upload targets and the Service Area name. After verifying the information displayed, click OK to start the upload.
4. Upload in progress
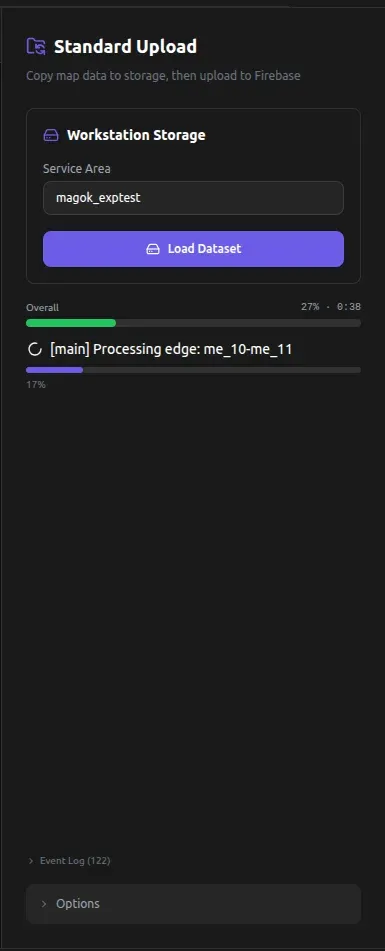
Once the upload begins, two progress bars are displayed.
- Overall (green bar) — shows the overall upload progress (%) and elapsed time.
- Current file (purple bar) — shows the name of the data currently being processed (for example,
Processing edge: me_10-me_11) and its individual progress.
Expanding the Event Log at the bottom reveals detailed per-step logs.
5. Upload complete
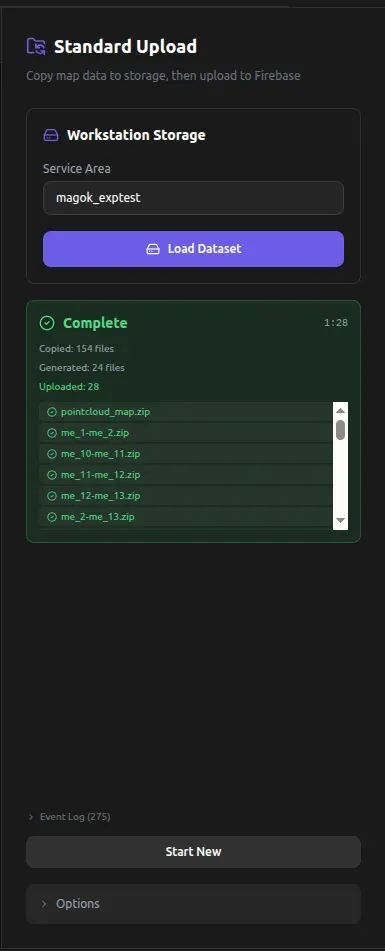
When the upload completes, a green Complete card appears, where you can review the following information:
- Elapsed time — the total elapsed time is displayed in
mm:ssformat at the upper right. - Processing results — the numbers of files copied (Copied), generated (Generated), and uploaded (Uploaded) are shown.
- File list — lists the names of the uploaded files.
To upload different data, click the Start New button at the bottom.
Troubleshooting
When the configured dataset is not the one you want
If the automatically configured Service Area or Local Time does not match what you intended, update them in the following order.
1. Change the Service Area
- Open the Service Area dropdown highlighted by the purple outline and select the Service Area you want.
- Click the Load Dataset button highlighted by the magenta outline; the dataset corresponding to the selected Service Area is reloaded below.
2. Select Local Time
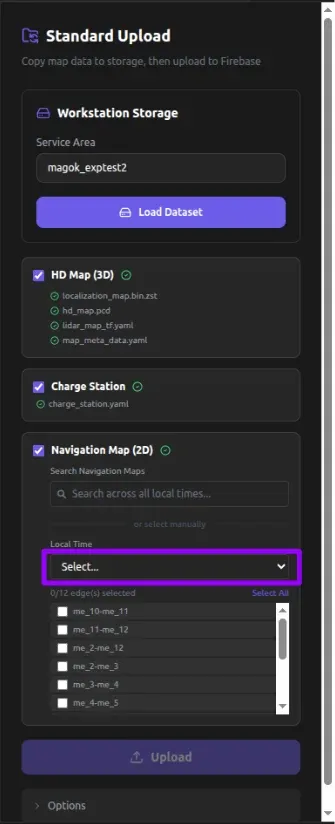
In the Navigation Map (2D) section, open the Local Time dropdown highlighted by the purple outline and select the time you want. Changing the time automatically refreshes the edge list for that timestamp.
3. After selection
After verifying that the changed data is correct, click the Upload button. The subsequent steps are the same as those starting at 3. Confirmation popup.
When a refresh has reset the data
Refreshing the page resets all configuration and leaves the panel empty. Reconfigure the data in the following order.
1. Initial screen
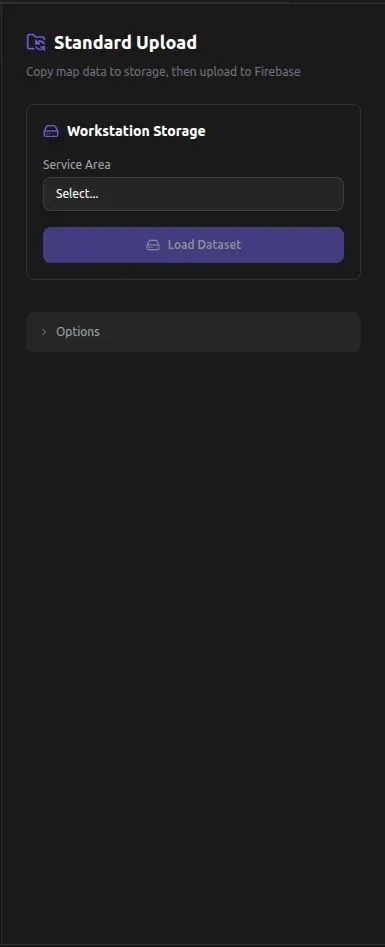
Because no Service Area has been selected, the HD Map, Charge Station, and Navigation Map items do not appear.
2. Select a Service Area
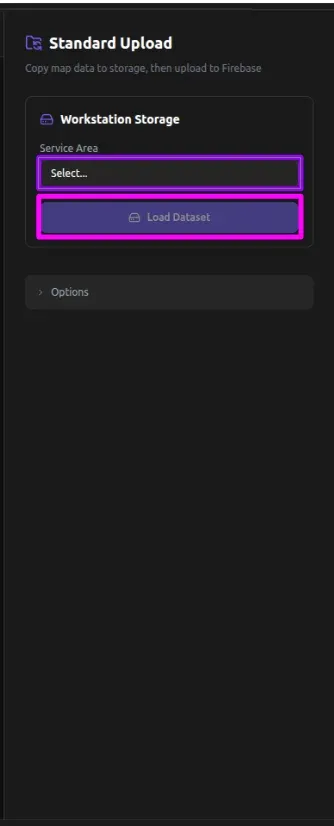
- Open the Service Area dropdown highlighted by the purple outline and select the Service Area you want.
- Click the Load Dataset button highlighted by the magenta outline; the dataset for that Service Area is then loaded.
The subsequent steps are the same as those starting at 2. Select Local Time in the “When the configured dataset is not the one you want” section above.