Loop Closure Correction
Loop closure correction corrects the accumulated error (drift) that arises during SLAM. It is performed in the Correction tab of the 3D Map Editor.
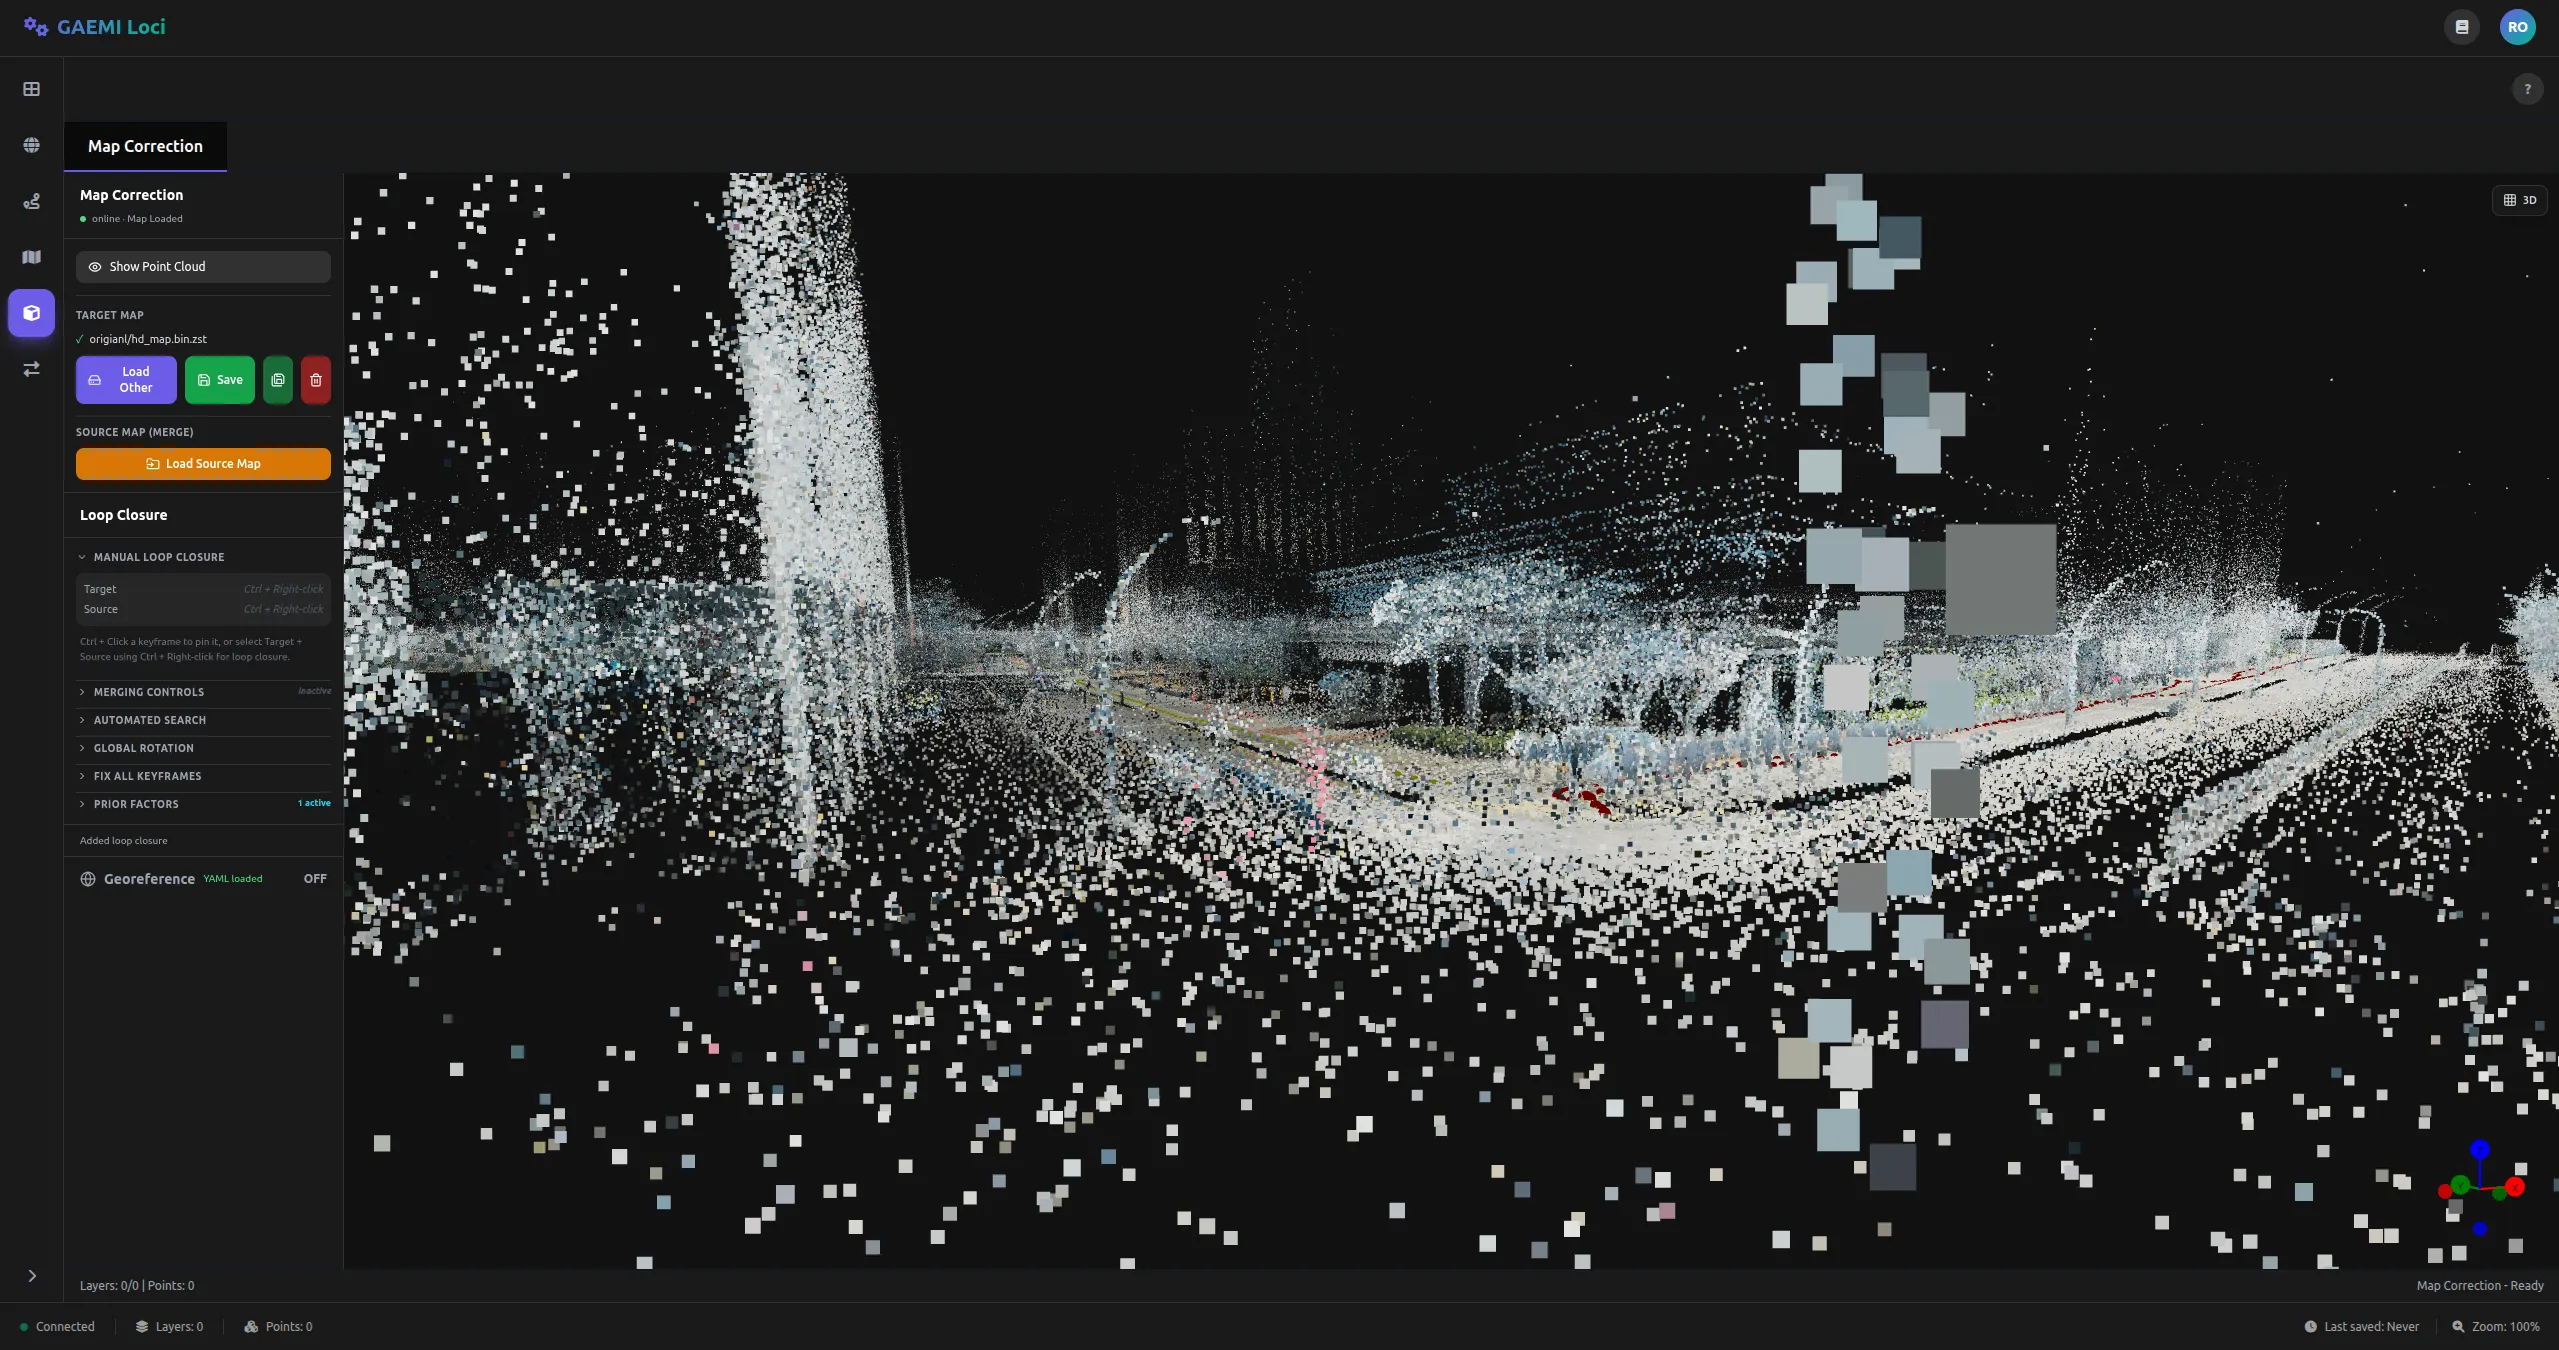
Screen Layout

- Left panel: Map load/save (MapControls), loop closure panel (LoopClosurePanel), georeference panel
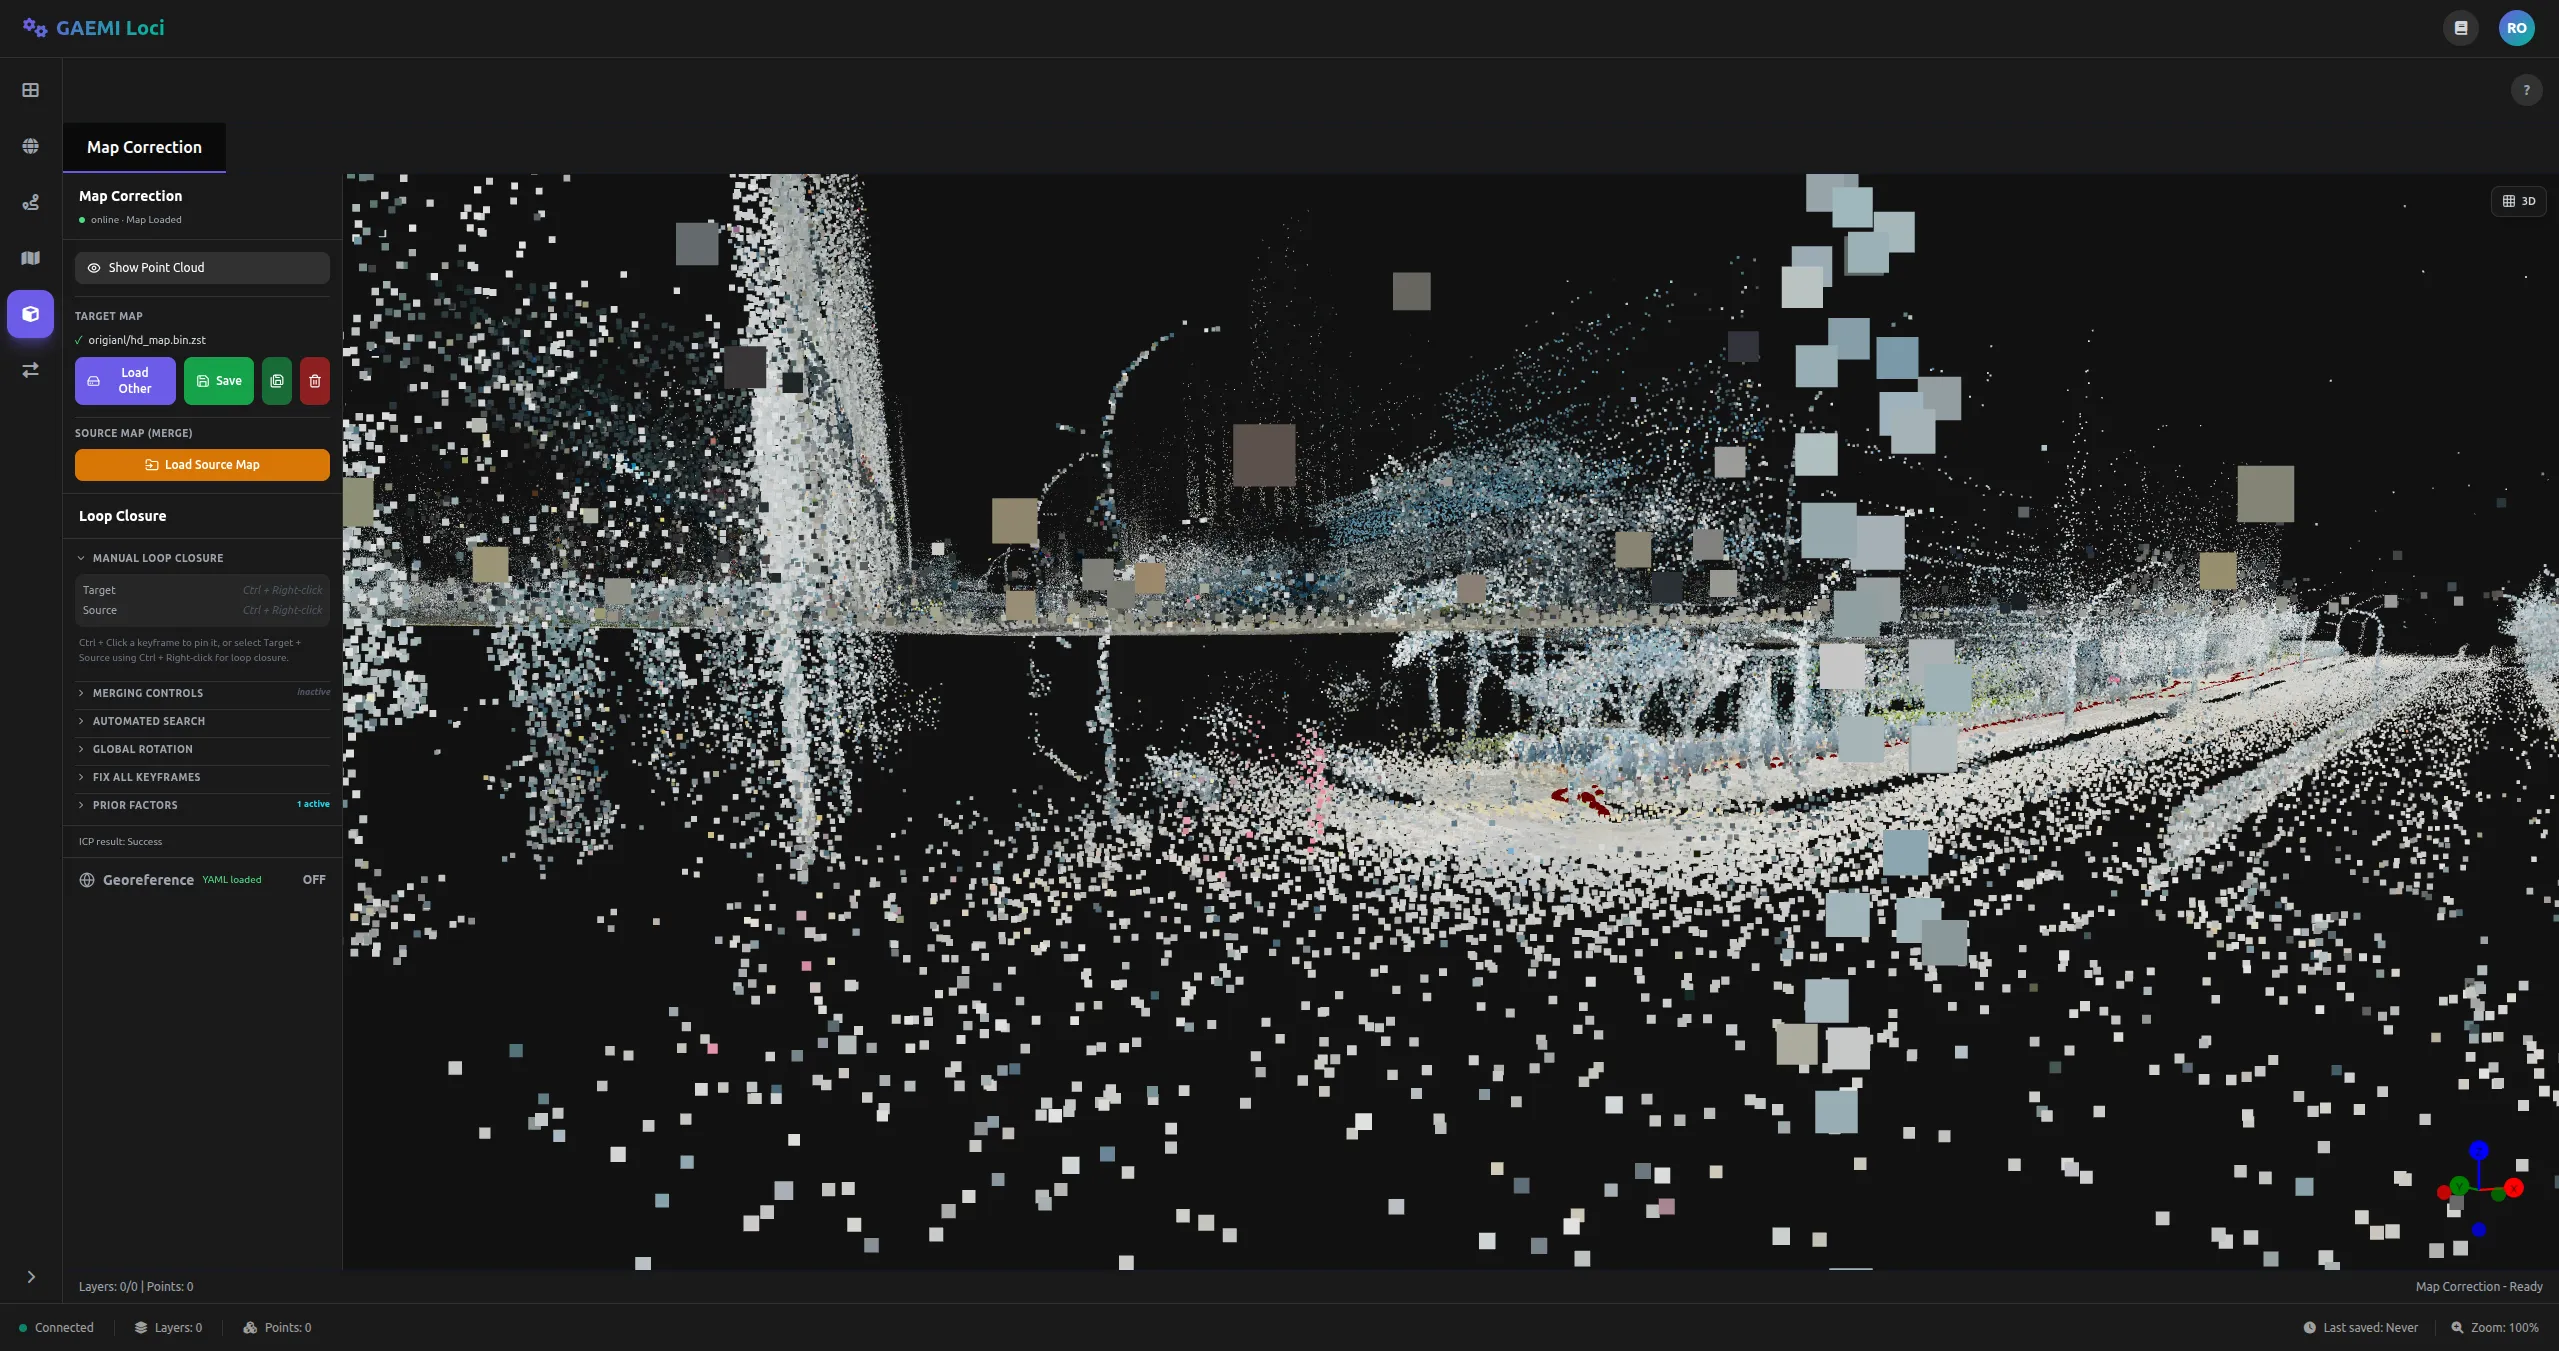
- Center: 3D viewport (point cloud + pose graph)
Keyframe Color Codes
Keyframes in the 3D viewport are color-coded:
| Color | Meaning |
|---|---|
| Red | Target map keyframe (existing map) |
| Green | Source map keyframe (map to be merged) |
| Cyan | Pinned keyframe (Prior Factor applied) |
Workflow
The full flow, from selecting target/source keyframes through gizmo adjustment, ICP alignment, and optimization:
-
In the 3D viewer,
Ctrl + right-clickthe reference keyframe, then click Set as Target (Red).
-
Ctrl + right-clickthe other keyframe to be corrected, then click Set as Source (Green).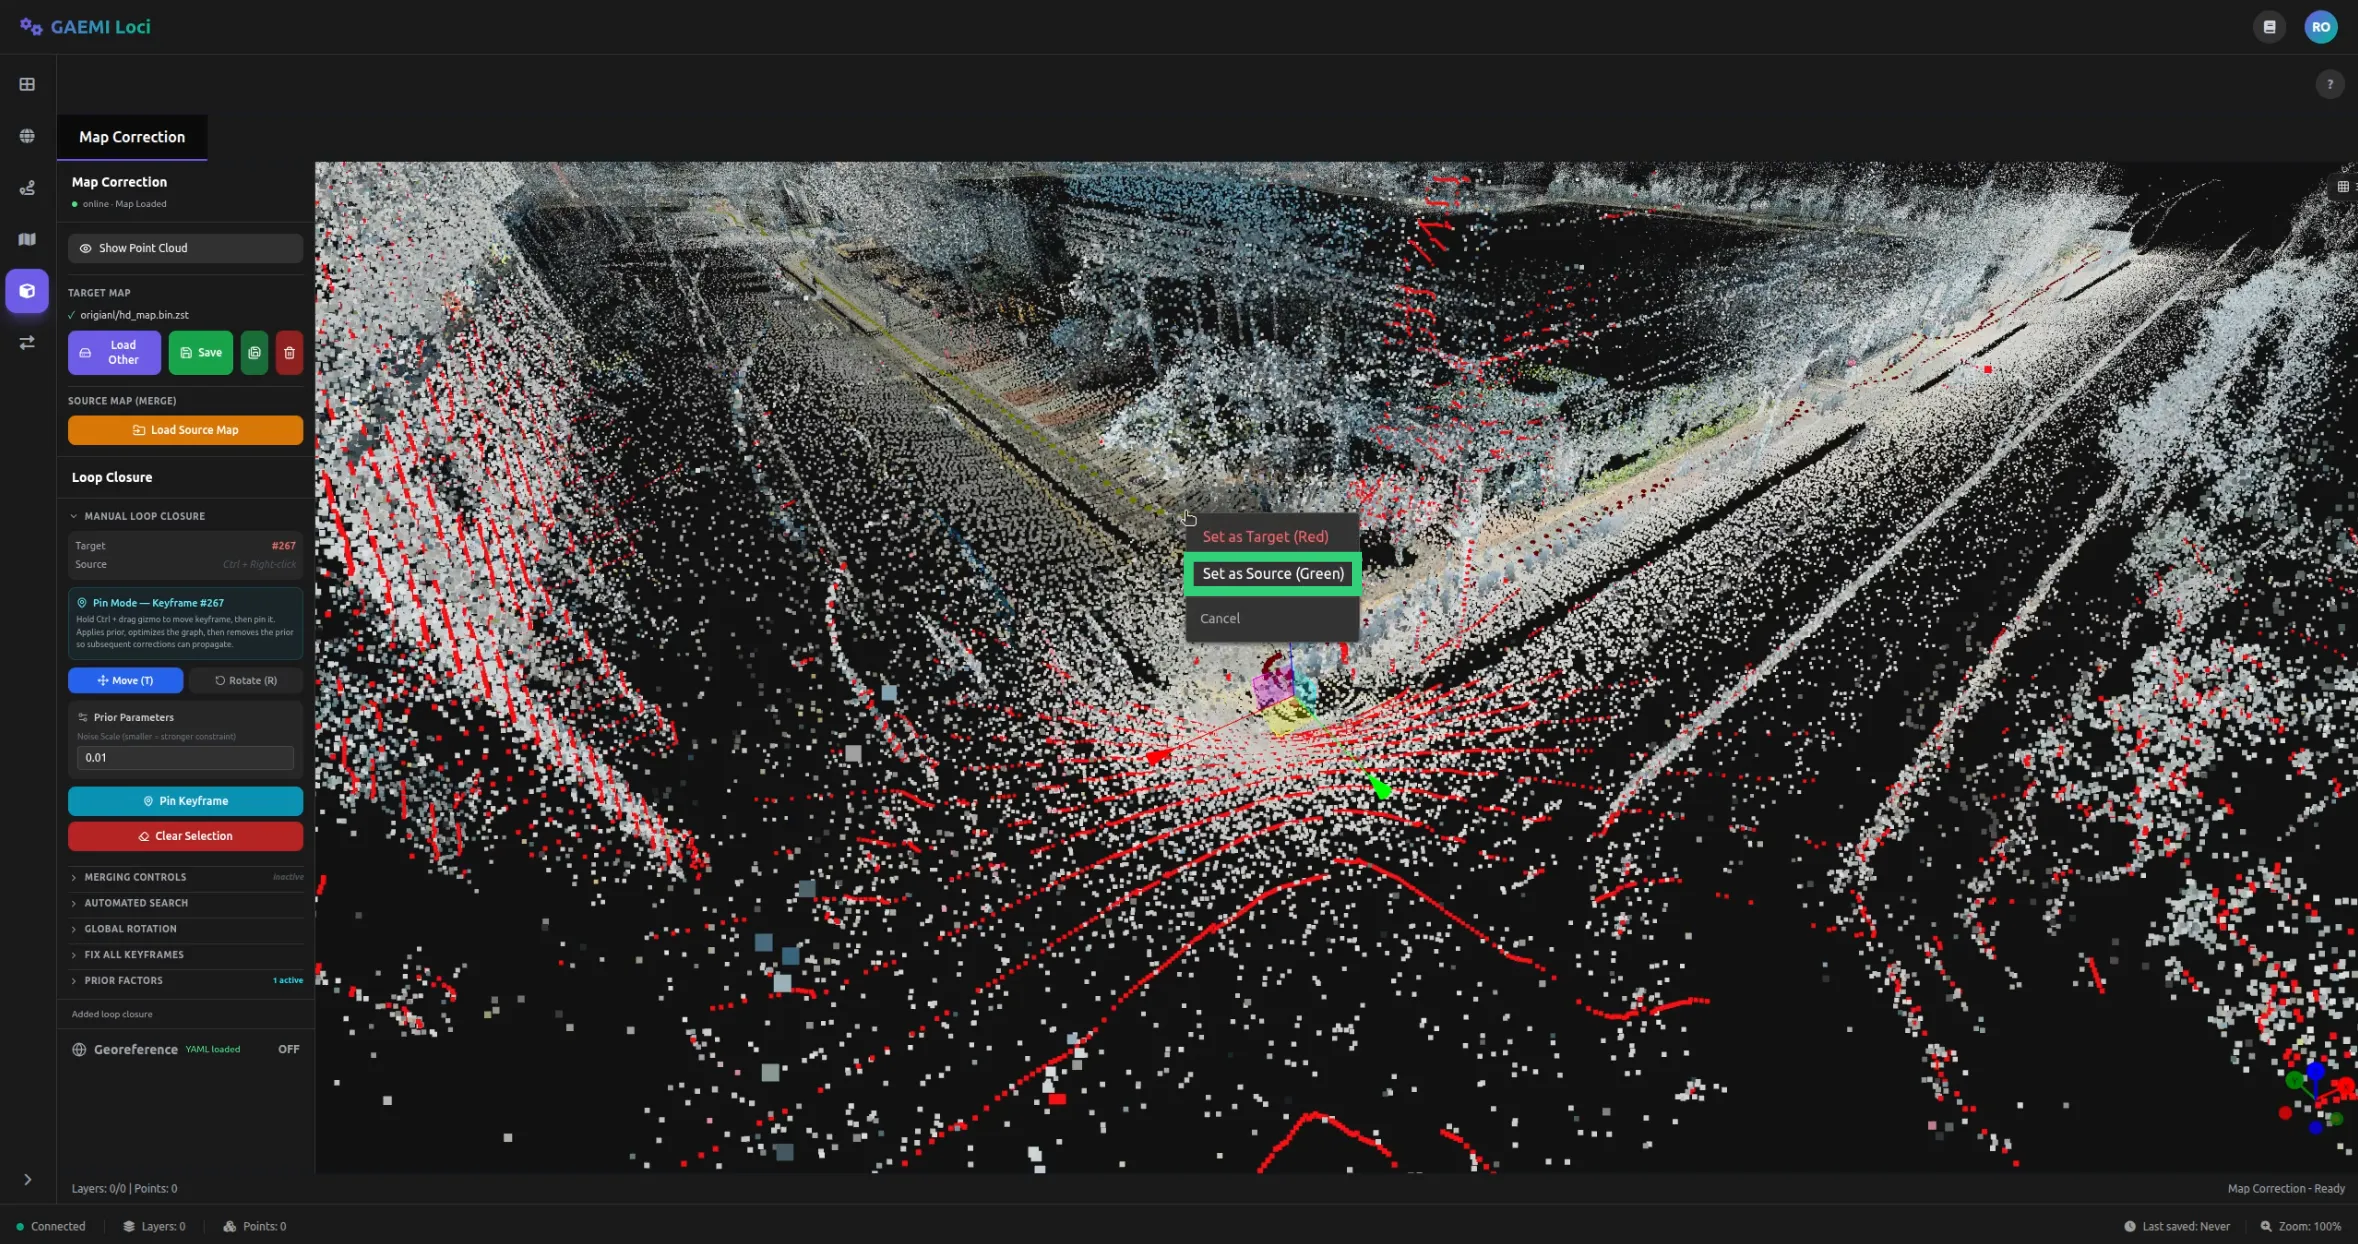
-
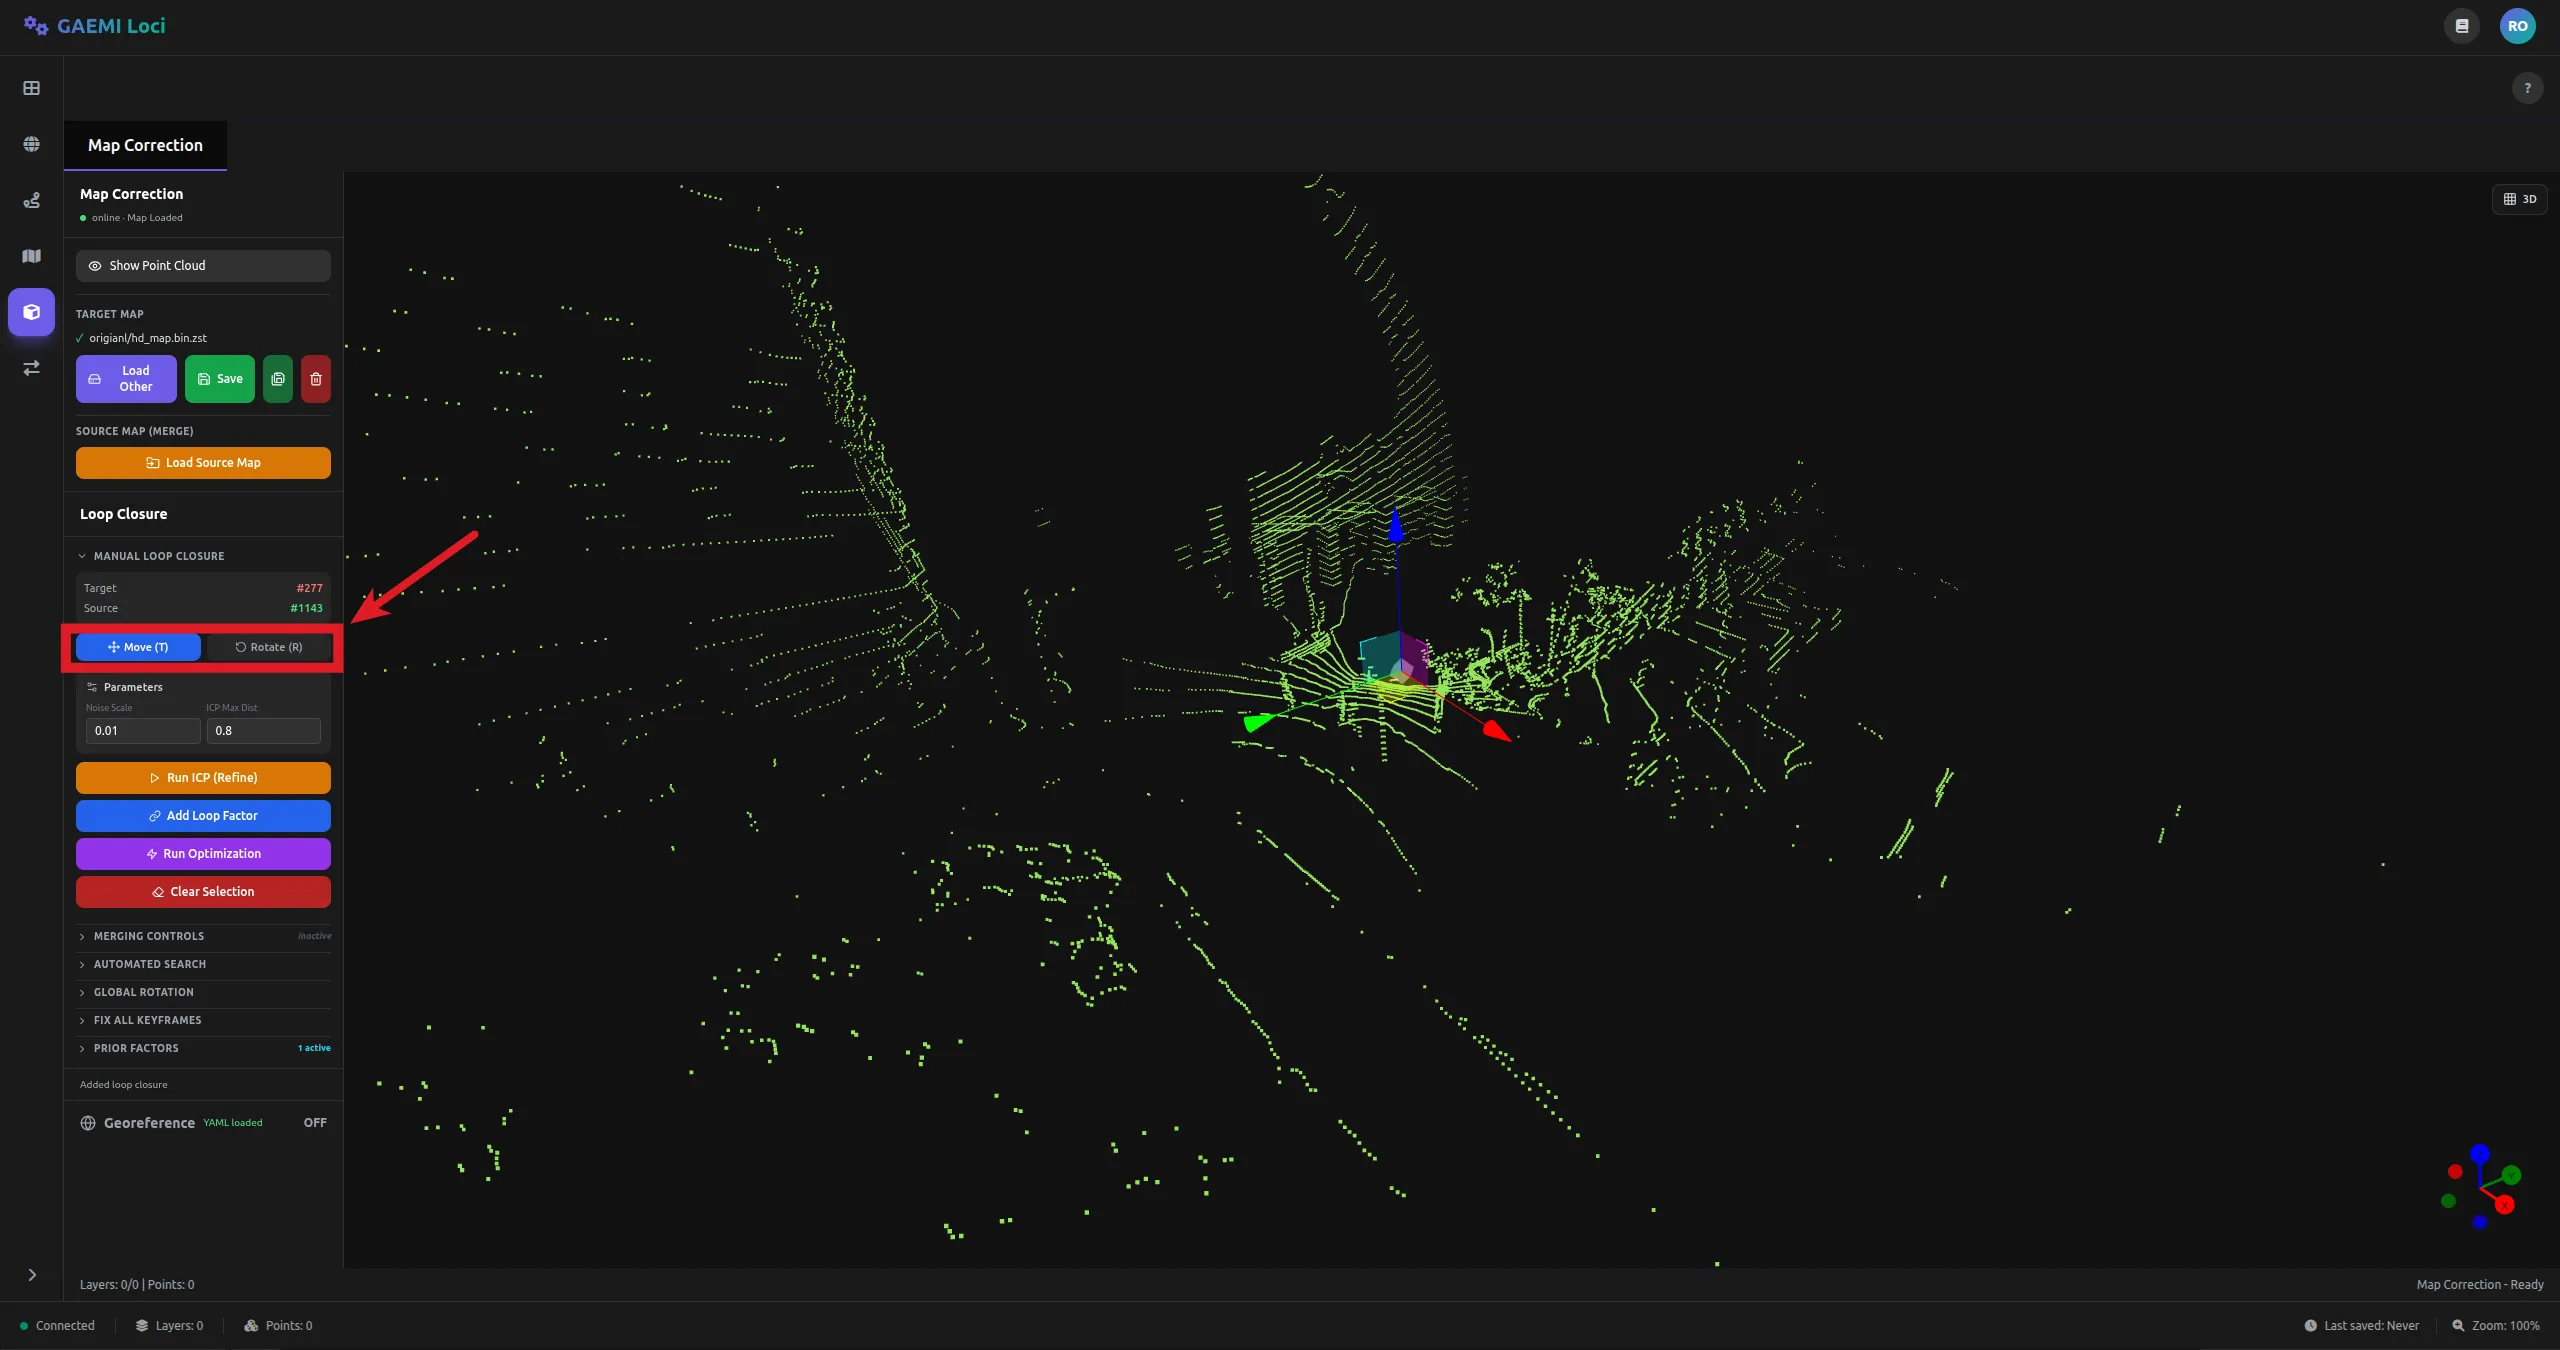
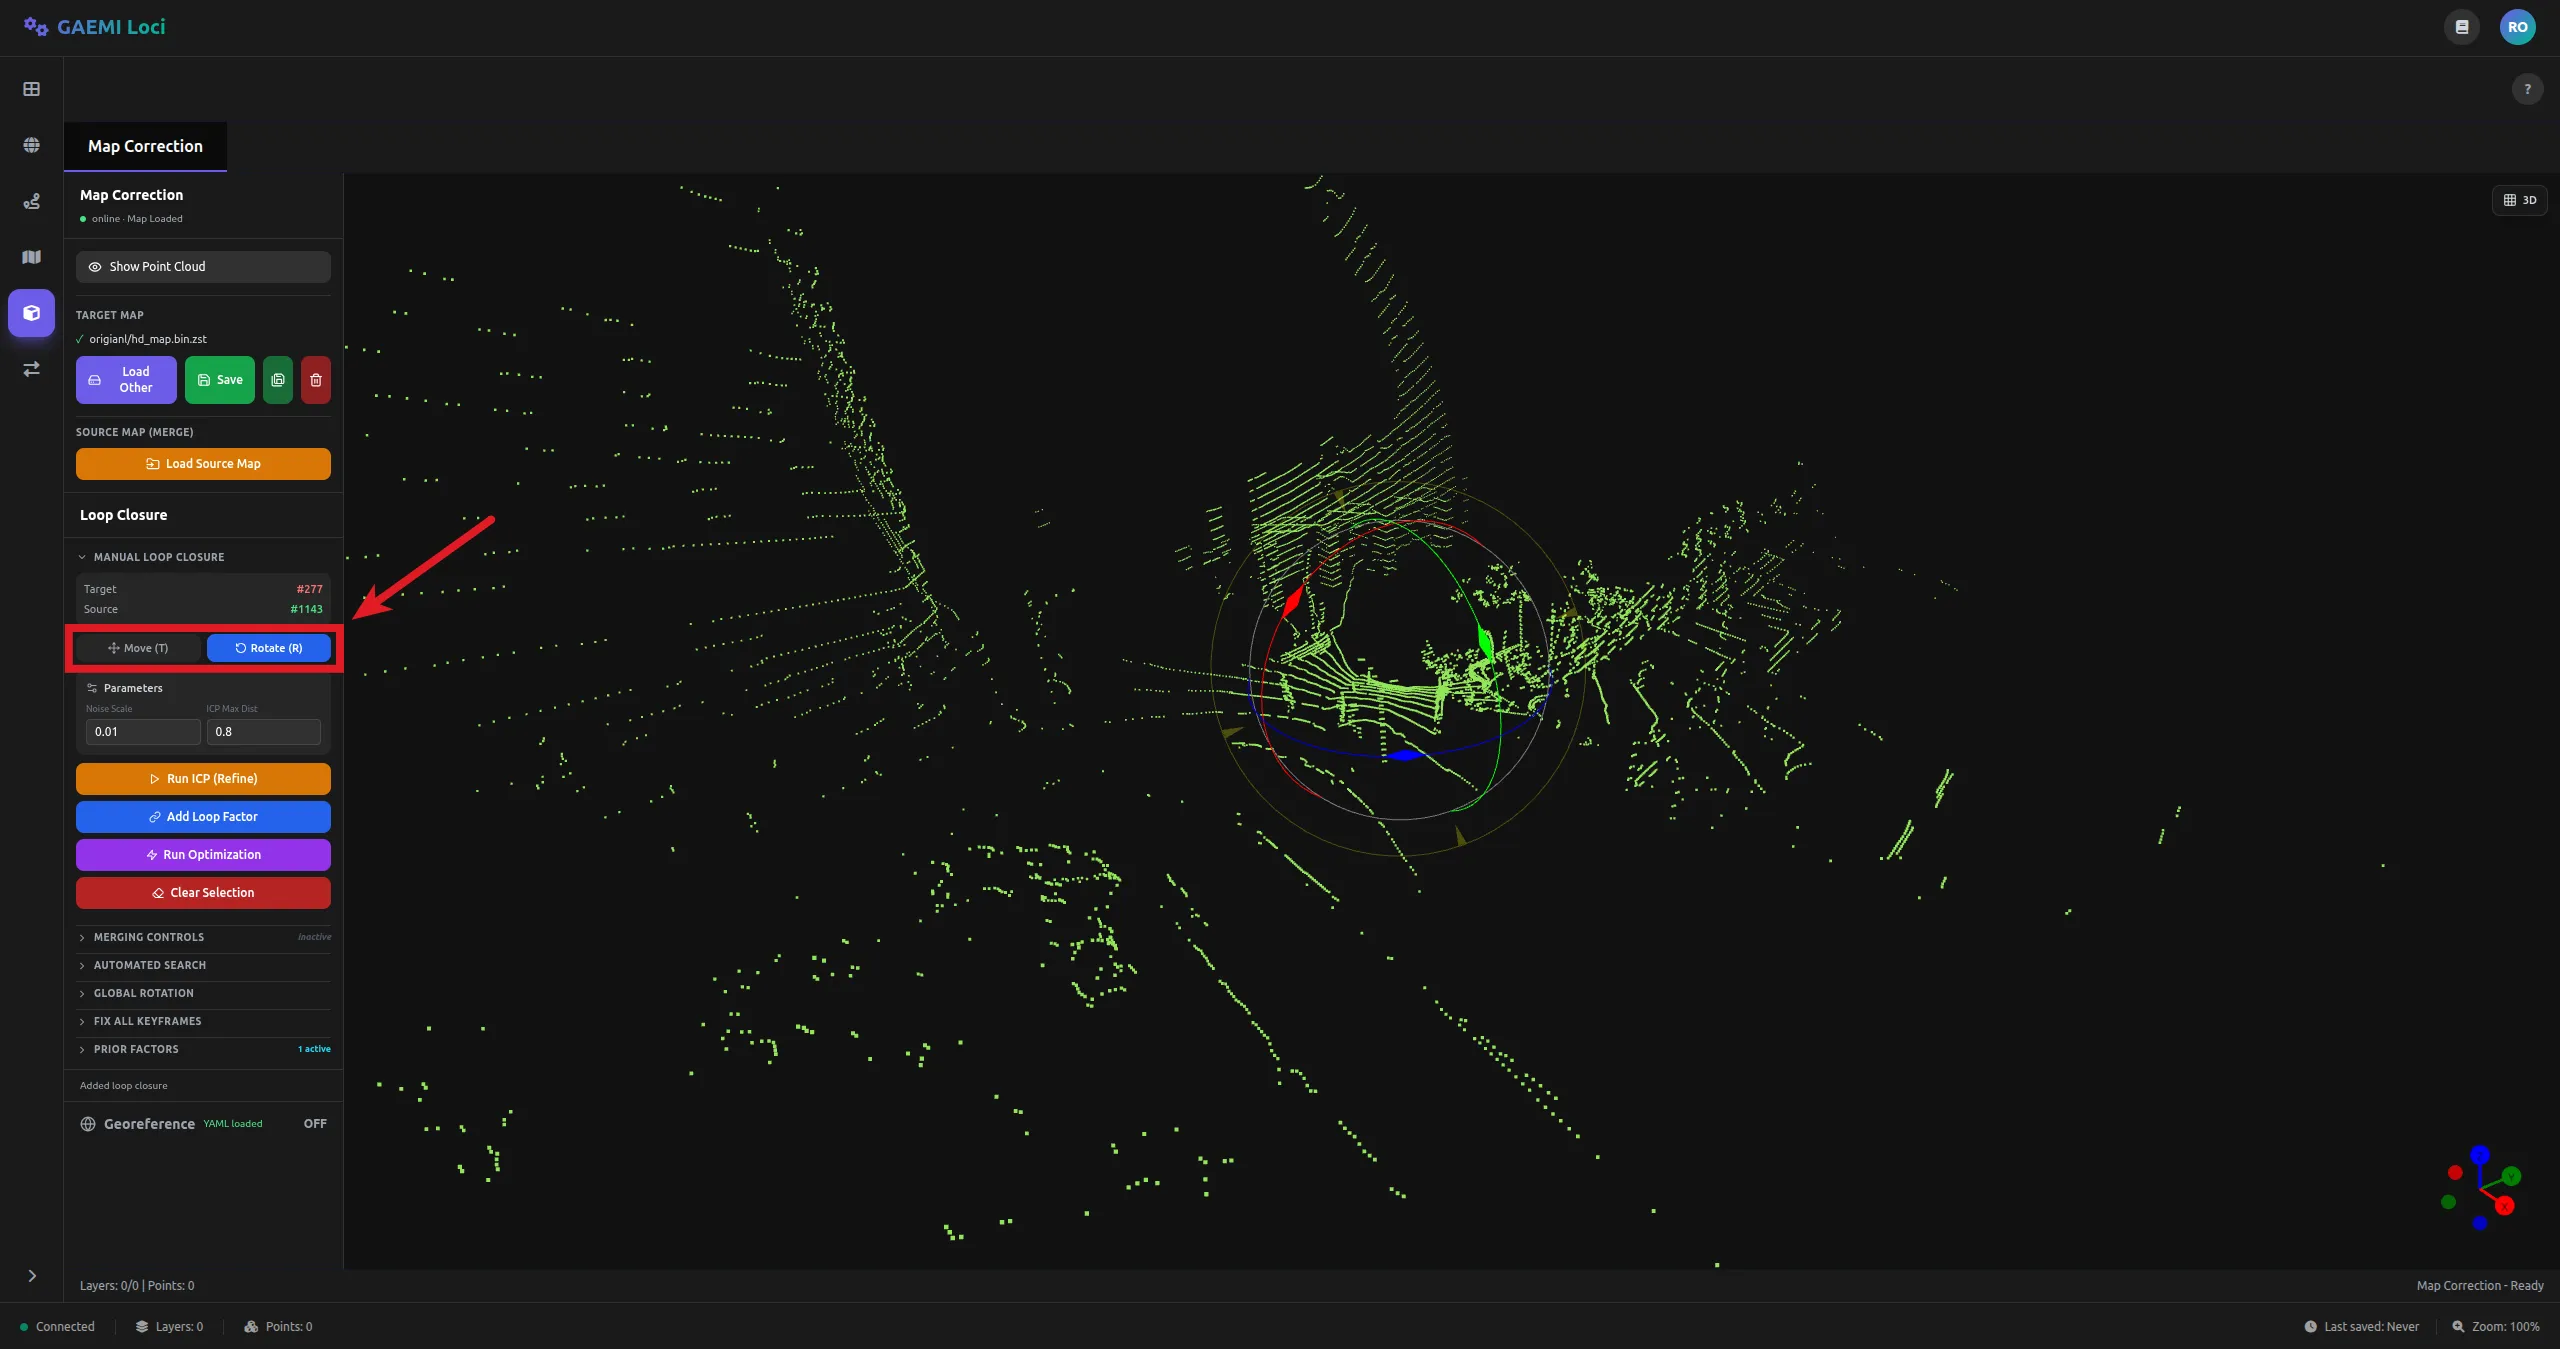
Toggle the gizmo mode with the
T/Rkeys, then holdCtrland drag the gizmo to manually adjust position and orientation.T: Translate /R: Rotate
-
Perform fine alignment with Run ICP.
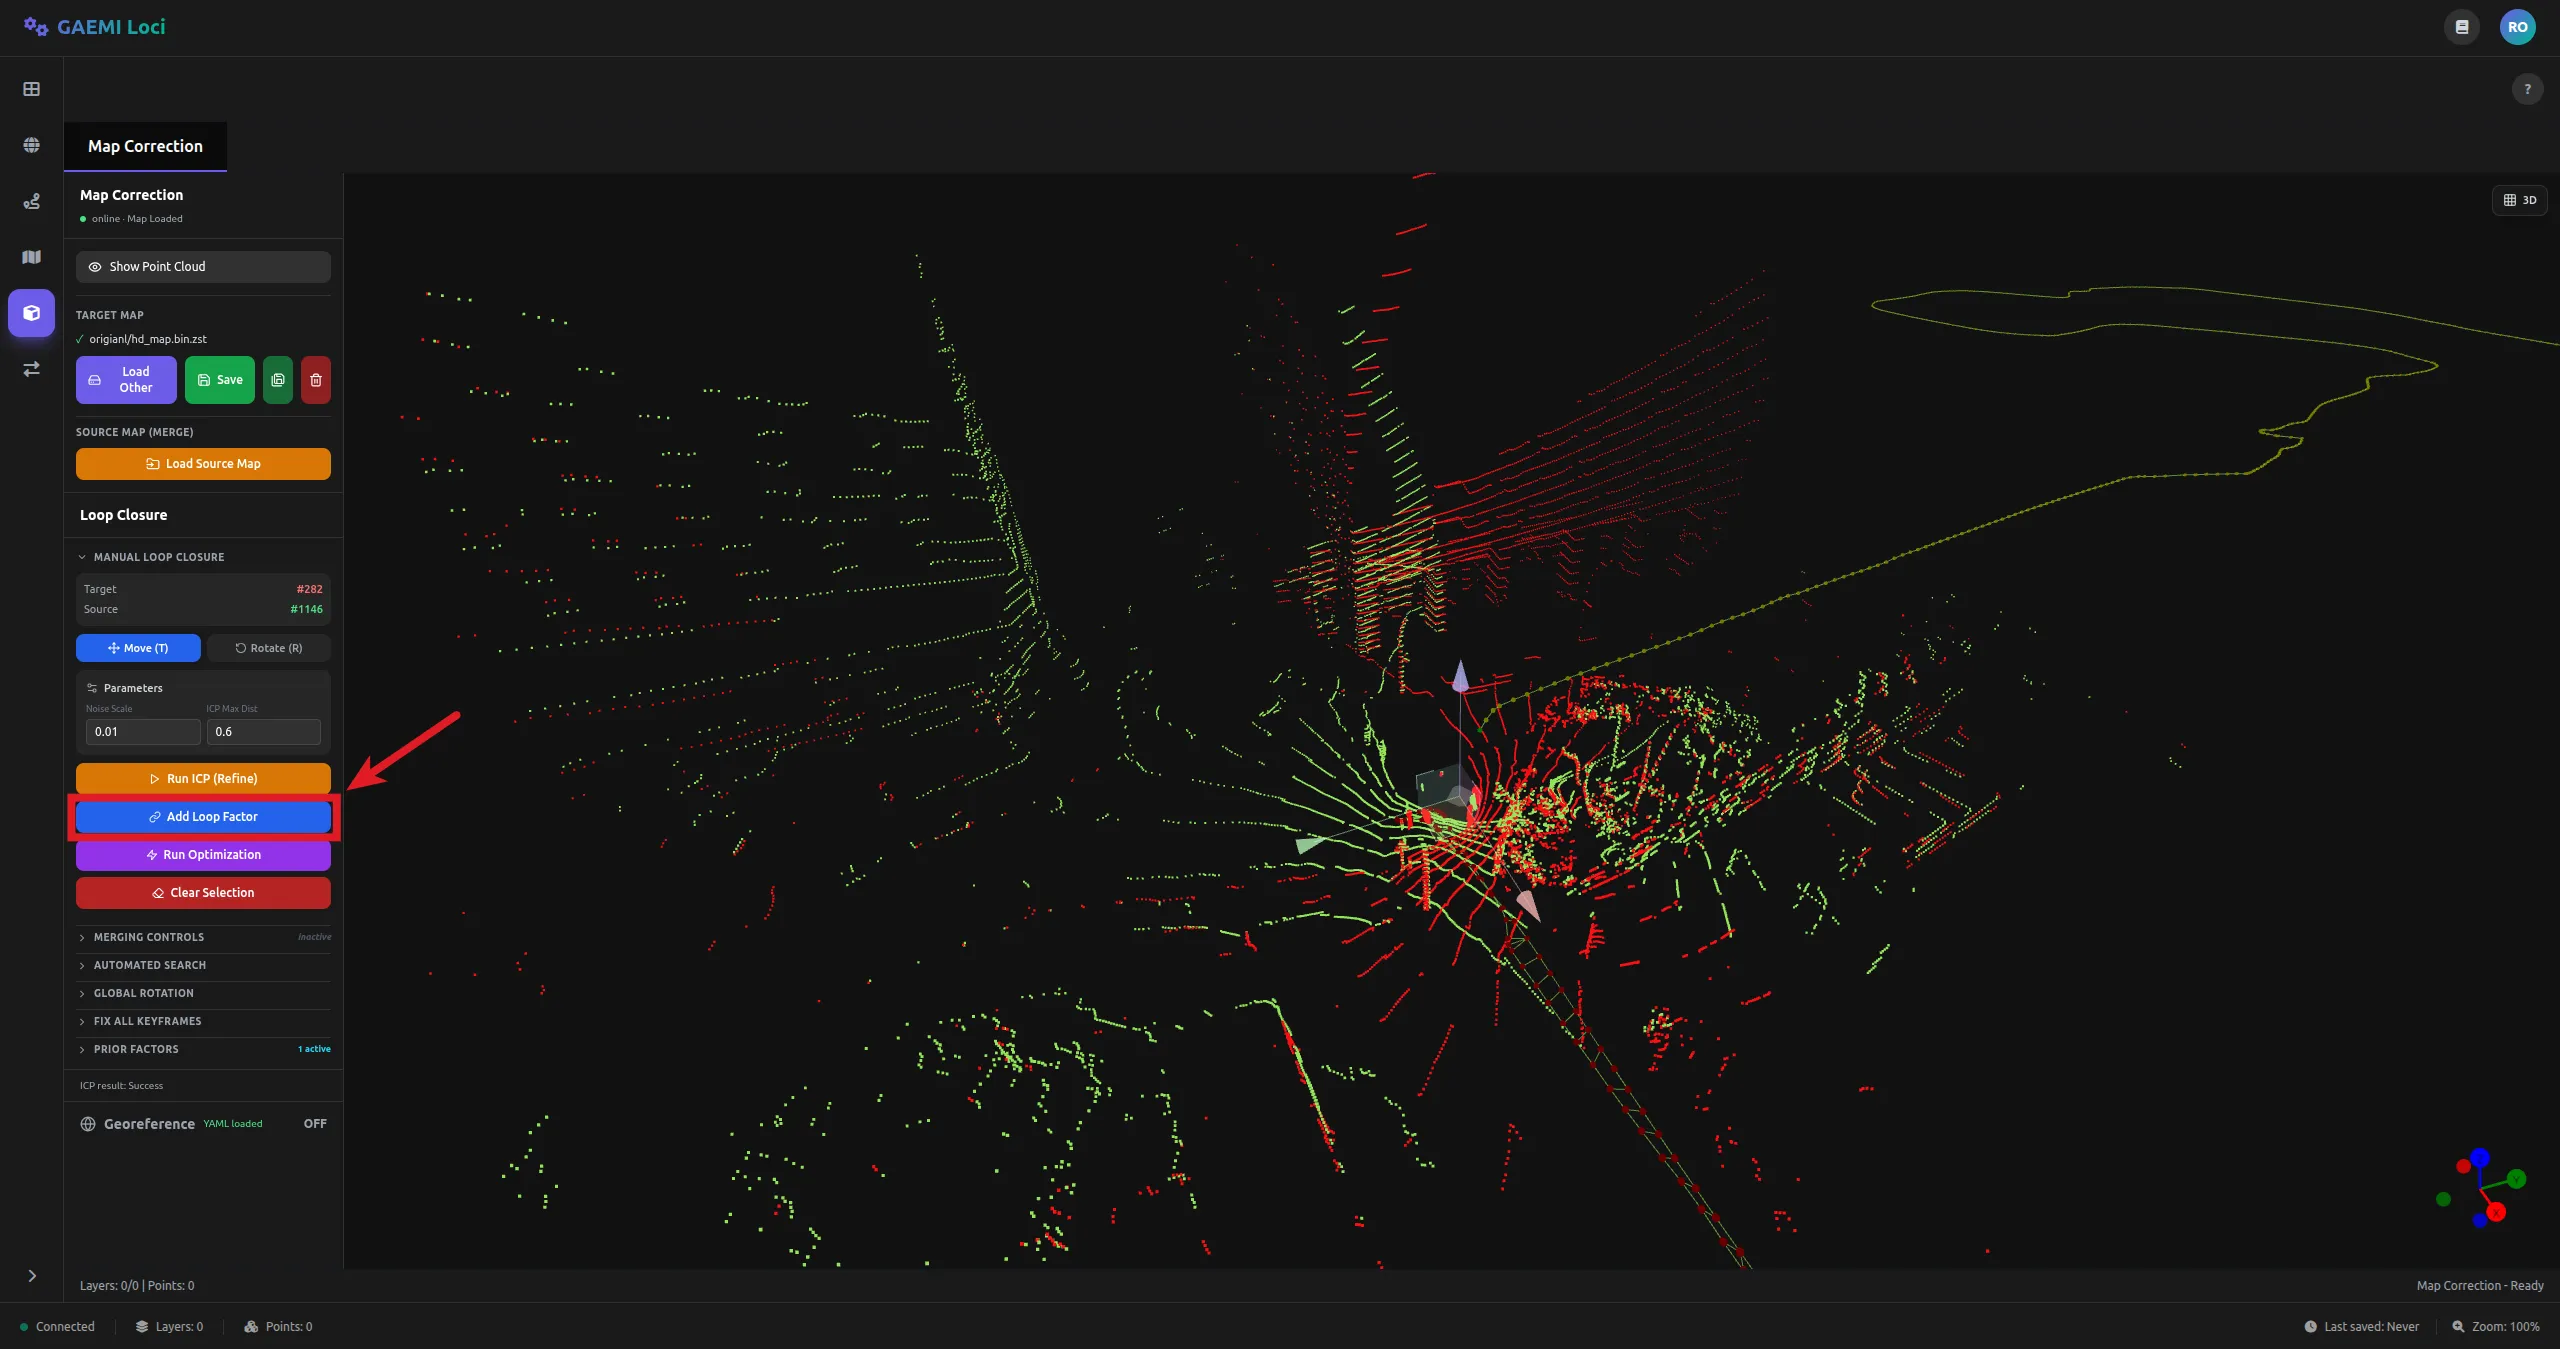
- Noise Scale: noise value of the Between Factor (default: 0.01, range: 0 to 1)
- Max Distance: maximum correspondence distance (default: 5.0 m, range: 0 to 10)

-
Click Add Loop Factor (links the reference keyframe with the keyframe to be corrected).
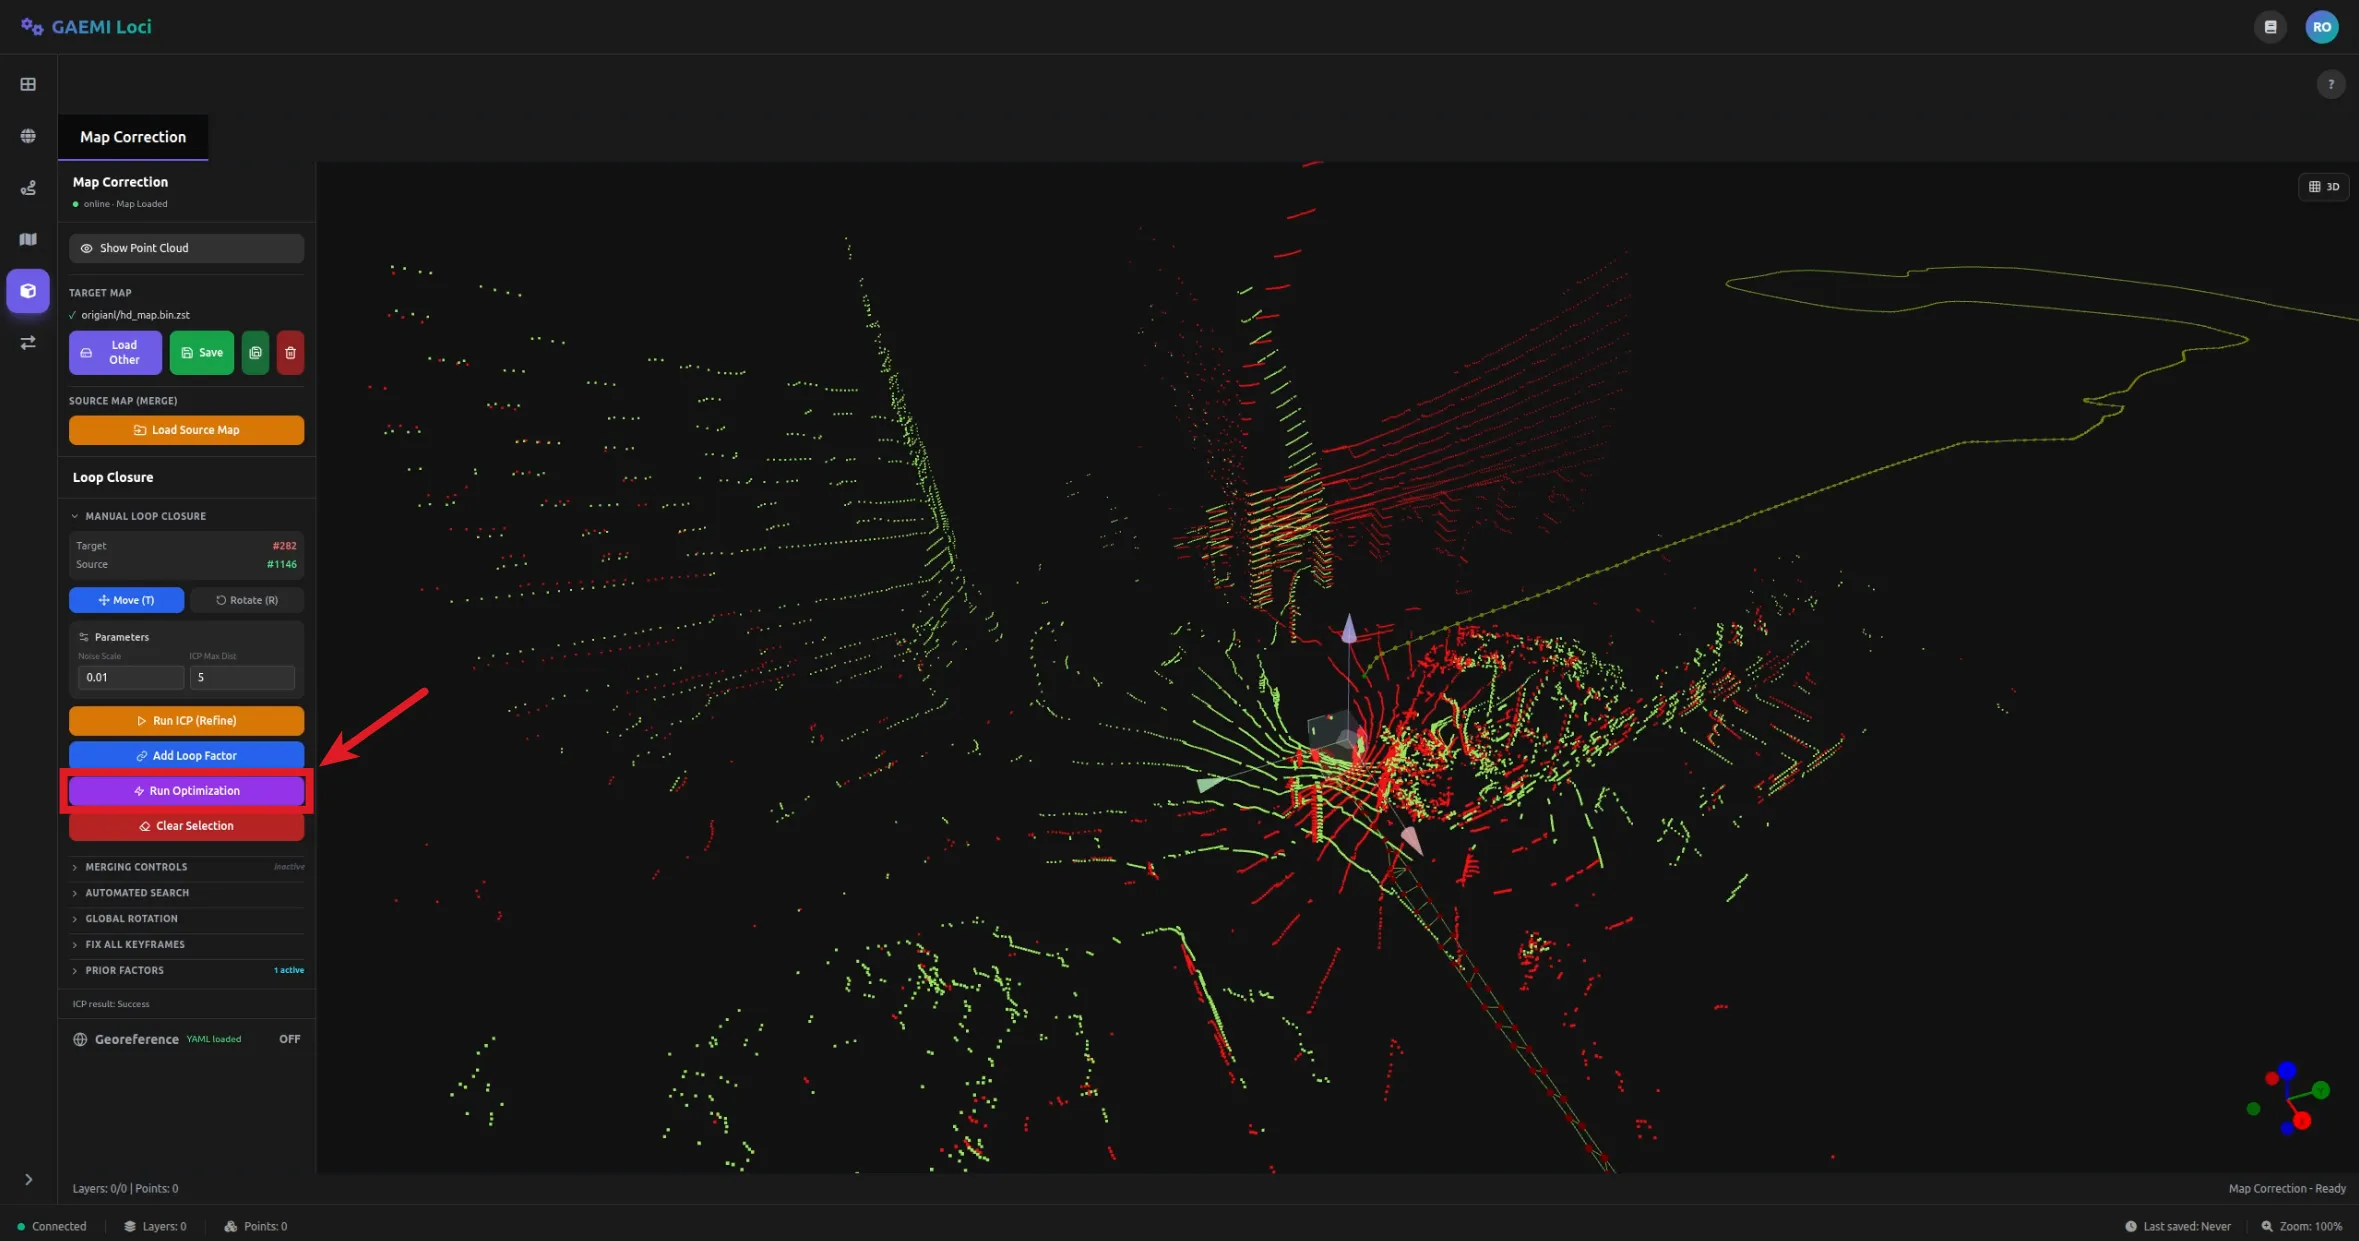
-
Optimize the map with the Run Optimization button.
Typical Workflow
[Manual loop closure workflow]1. Ctrl + right-click the reference keyframe → Set as Target (Red)2. Ctrl + right-click the keyframe to be corrected → Set as Source (Green)3. Toggle gizmo mode with T / R, then Ctrl + drag to adjust position/orientation4. [Run ICP] → fine alignment5. [Add Loop Factor] → link the reference and corrected keyframes6. [Run Optimization] → optimize the map7. Review the result and save with [Save]Saving the Map
Corrected maps are saved in Boost serialization + Zstandard compression format (.bin.zst).
From the MapControls on the left panel:
- Save: Saves immediately to the current path
- Save As: Saves to a different path